Herb and Orange Roast Turkey

Roast turkey is the traditional centerpiece for Thanksgiving dinner in the United States and Canada, as well as for Christmas in much of the English-speaking world.[1] A native of the New World, wild turkeys were a staple of many native diets, and the species was first domesticated by ancient Mesoamericans nearly four millennia ago. The Spanish brought domesticated turkeys back to Europe in the 16th century, where the animal was bred and farmed.[2]
In the early United States, wild turkey was a common sight on tables, as the birds were abundant in the Eastern forests and easy to hunt. However, there was no particular association between turkeys and holiday feasts. This changed by the end of the 19th century, as the eastern seaboard industrialized and domesticated turkeys became a common holiday roast in New England and the Mid-Atlantic states. However, other regions of the United States rarely consumed turkey for Thanksgiving (itself an inconsistently celebrated holiday before the 1930s).
The turkey did not become the national standard for Thanksgiving until the Second World War. With much of the nation under arms, it was considered critical for the morale of the troops that hearty meals be served on holidays, including Thanksgiving. When asked to produce Thanksgiving dinners, the Army simply mass produced the Thanksgiving dinner served at West Point (New York), while the Navy did the same with the menu served at the US Naval Academy (Annapolis, Maryland), both Mid-Atlantic states with similar traditional Thanksgiving offerings.
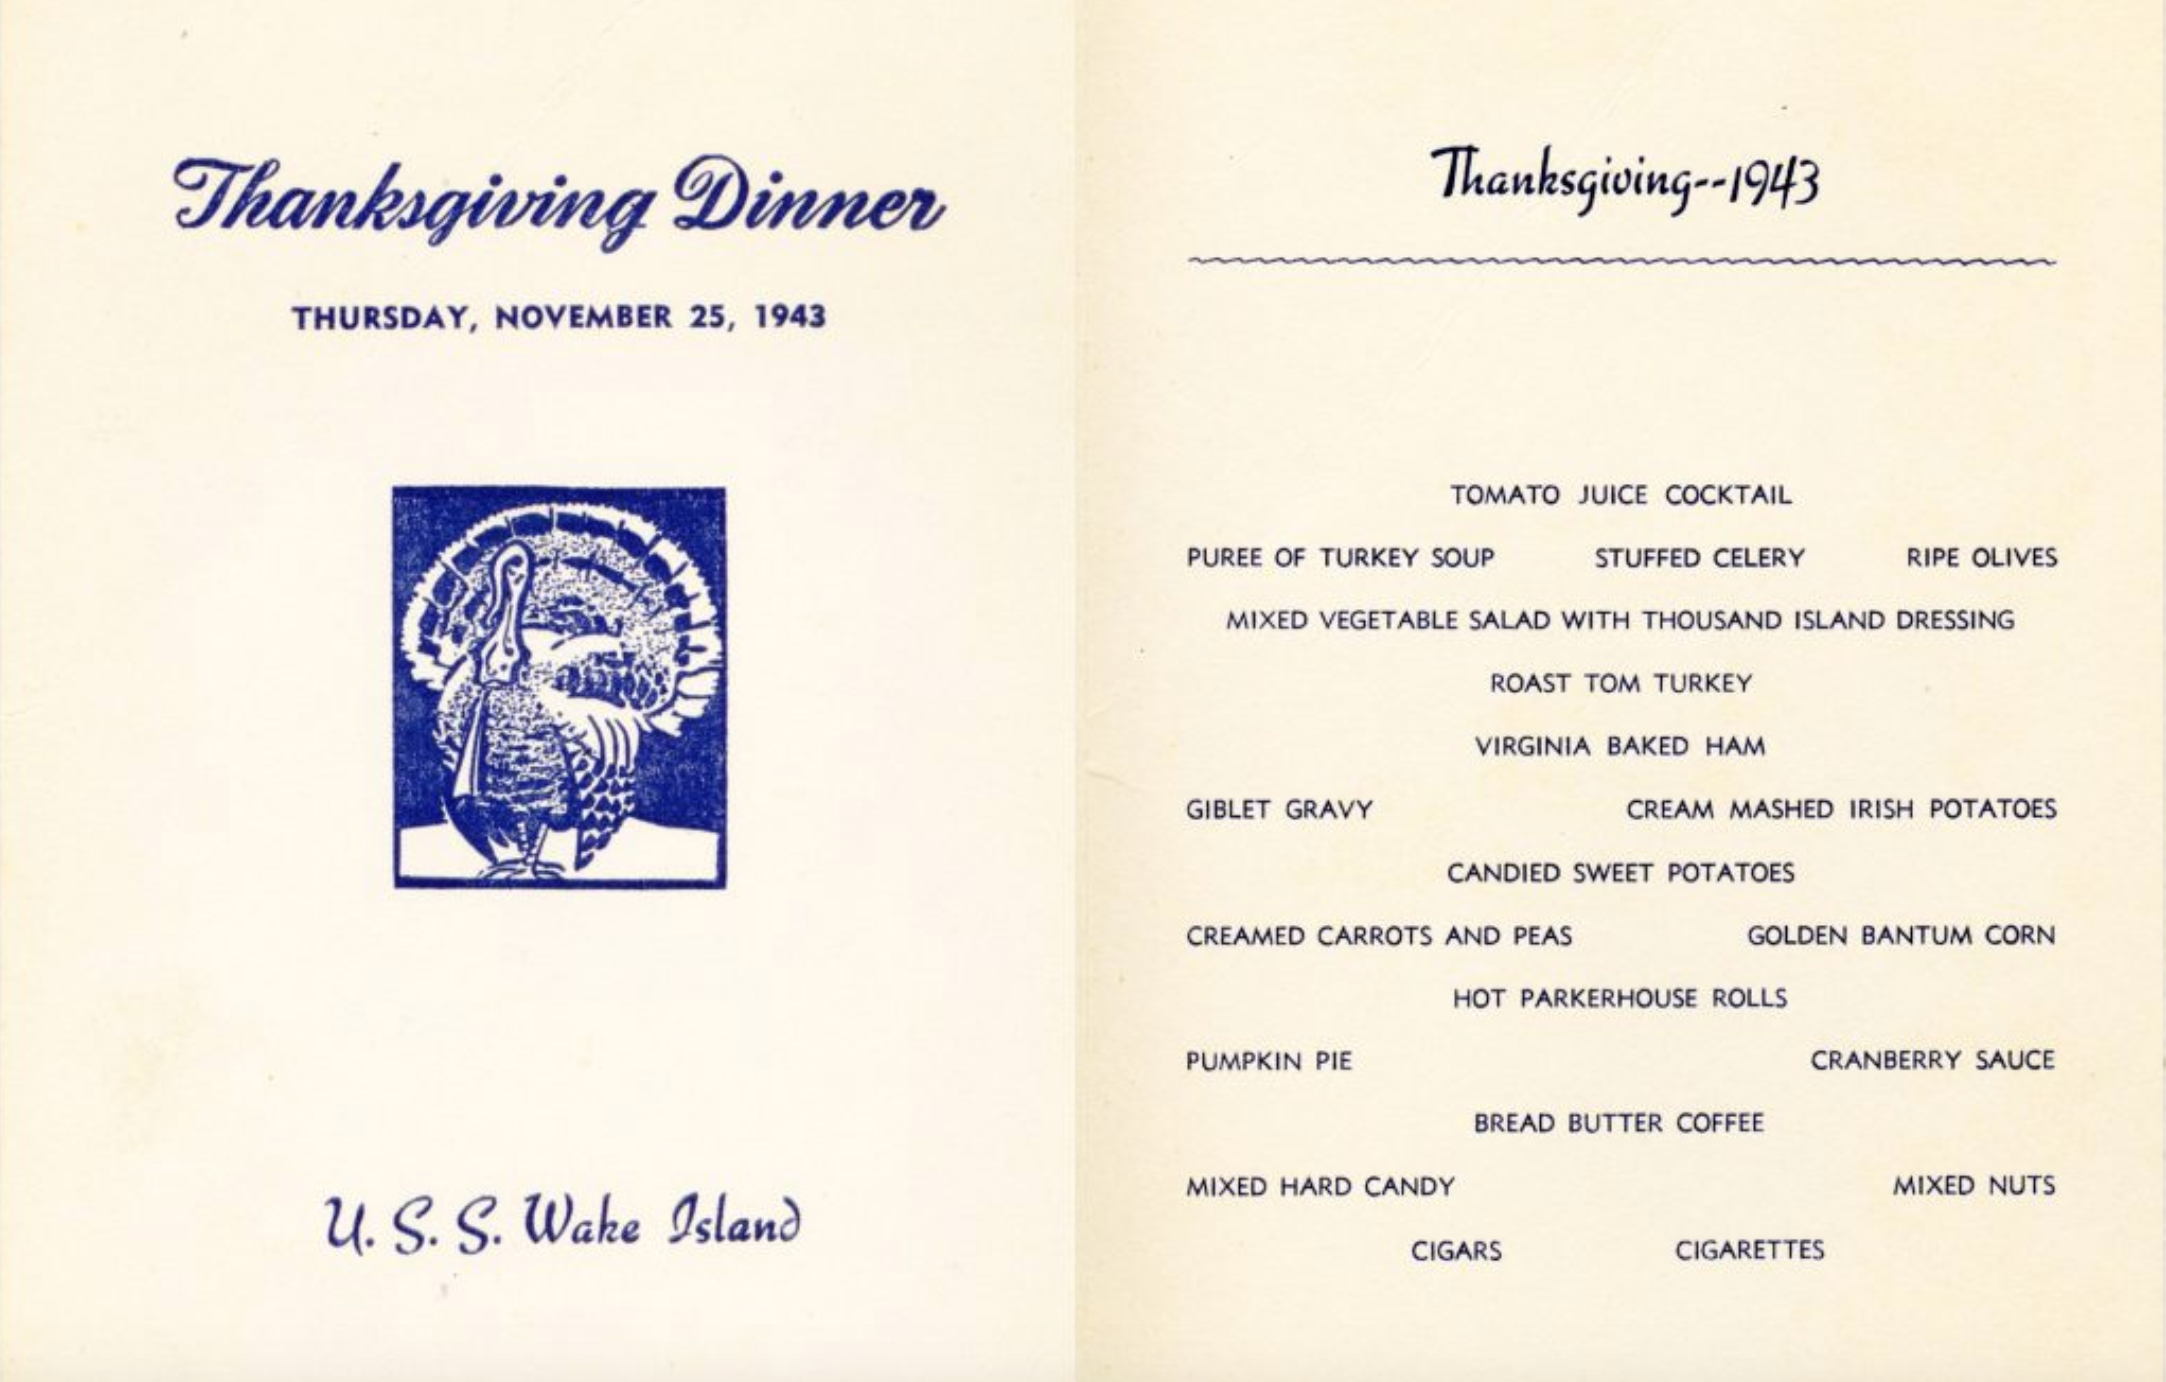
A typical wartime US Navy Thanksgiving menu from the escort carrier USS Wake Island (CVE-65) in 1943. We see present all of the components of what has become the canonical American Thanksgiving meal: turkey, celery stuffing, ham, mashed potatoes, gravy, cranberry sauce, sweet potatoes, and pumpkin pie.
Thus, the generation that fought the war was indoctrinated with the idea that Thanksgiving dinner meant turkey and ham, mashed potatoes and gravy, cranberry sauce and sweet potatoes and pumpkin pie—the national standard had been set in stone.
I have always found it curious that of the menagerie of animals that humanity has roasted through the centuries, the only two that have survived to be commonly cooked in modern American home kitchens are chickens and turkeys. Cuts of beef, pork, and lamb are relatively uniform their geometry, muscle properties, and fat content. Great for roasting. Mutton and certain cuts of beef have large amounts of connective tissue which dissolve into collagen under steady heat. Great for roasting. Fish are flat and only really have four muscles. Great for roasting. Duck and geese have so much fat that they are essentially self-basting. Great for roasting.
But the humble chicken and its larger cousin, while delicious in many preparations, are just not ideally suited to roasting whole. They are not geometrically uniform, making it difficult to efficiently move heat into the meat. They contain two spatially separate muscle types with very different demands—the fattier, denser, dark meat with more connective tissue, and the leaner white meat, with no protective layer of fat to shield it from the unyielding heat of an oven. To make matters worse, of all the animals mentioned above, chicken and turkey are the only ones for which every bite must be fully cooked. A chicken is small enough for us to fudge a couple of these factors, but when roasting a turkey there is nowhere to hide. The prevalence of whole poultry in modern home cuisine, of course, came about as a result of large socioeconomic and historical forces, rather than any reason as trivial as good taste and ease of cooking.
There are of course, several ways to sidestep the problems of geometry that a turkey presents us. Spatchcocking the bird, which flattens the bird and increases the surface area to mass ratio and reduces cooking time. Going one step further, deconstructing the turkey into its individual parts—breasts, legs, thighs, wings—and cooking each independently is a great way to gain more control over the cooking process, allowing one to cook each part in the optimal manner. But let us say that we are determined to deliver a bird to the Thanksgiving table that looks like it’s come out of a Norman Rockwell painting. Is it still possible to roast a whole turkey with juicy white meat, tender dark meat, and crisp, flavorful skin? History and tradition have dealt the cards, and we must play this hand to the best of our ability.
Let us begin by picking a bird. A natural turkey is a bird which contains no additives. However, usually grown in factory conditions, they are less flavorful than their free range and heritage cousins. Organic and free-range birds often are raised on a more natural diet and with more space, both of which contribute to a healthier and more flavorful bird. Heritage turkeys belong to specific breeds, such as Bourbon Red, Black, and Bronze. They are generally smaller and more expensive—but also more flavorful. A kosher turkey is salted as part of the koshering process, and is therefore pre-seasoned. When cooking a kosher turkey, you can skip any brining or dry brining steps.
A self-basting turkey is a bird which has been injected with a brine solution (and sometimes emulsified fat) to keep it moist. It succeeds in this objective, but the meat is often mushy and incredibly salty. While they are easier to cook, they tend to be disappointing in the texture and flavor departments, and also contain a large number of additives. I would steer clear of self-basting turkeys. It is best to pick a fresh turkey if possible, but high quality frozen birds are also available. If your turkey is defrosted, make sure it is completely defrosted before starting this recipe.
The larger the turkey is, the more difficult it is to balance the thermodynamic needs of the different parts of the animal. The closer it is to chicken-size, the more leeway we have, and 15 pounds or so is the upper limit for success when roasting whole turkeys. If you have more people than a 15 pounder will feed, get two smaller turkeys rather than one large one.
With a turkey chosen, it is time to craft a roasting strategy. The dark meat of the bird—the legs and thighs—have enough moisture to not require moisture augmentation, but they will benefit from a long cook. For the skin to be crisp, it must be dry, and for browning to occur, the skin must be roasted at a high temperature. The white breast meat is lean and low-moisture to begin with, and it is going to need a lot of help if it is to survive the roast with even a modicum of moisture. Also, because the white meat is so thick, the only way to cook the center of the breast without drying out the meat closer to the surface is to cook for a long time at a relatively low heat.
How do we balance these requirements? The dark meat will more or less take care of itself provided the roast is long enough. The skin will need to be dry and start at high heat in order to brown, but we can’t keep the bird in the oven at high heat for long without turning the white meat into a desert. Therefore, we will start the turkey at a high heat (500° F) to brown the skin, and immediately turn the oven down to (300° F) for a long slow cook. We will pull out a few tricks to color the skin—salt to dry the skin, oil and butter to more quickly move heat into the skin, baking soda to increase the pH and therefore reduce the temperature at which the Maillard reaction occurs, and a sugar-filled glaze to assist in browning. We will also do what we can to protect the breast meat, first by providing the breast with a protective and flavorful shield of butter, and by helping it retain moisture through an extended salting—a dry brine.
Why a dry brine rather than a wet brine (an extended soak in a salt solution)? Let us first briefly discuss how a brine works. Some attribute the effectiveness of a brine to osmosis, but this explanation makes no scientific sense—if osmosis was the main factor, a bath in a salty solution would draw water out of the meat, not the other way around. Rather, the salt in the brine acts by damaging the proteins which form muscle fibers, making them tighten up less effectively when cooked and helping the muscle retain moisture. While a wet brine effectively brings the salt to the table, it also waterlogs the meat, resulting in a moist bird, but not necessarily a flavorful one. Flavored brines don’t help either because the large aromatic molecules in stock are too large to penetrate muscle fibers anyway. A wet brine also soaks the skin in moisture, making it difficult for us to crisp the skin rapidly. If salt is the only thing we need, it is best to simply salt the bird—hence the dry brine.[3]


On the day before the roast, pat the fully thawed turkey dry with paper towels, and tuck the wingtips under the bird. Sprinkle all sides of the turkey evenly with salt, including the inside of the cavity. The turkey should be well coated with salt, though depending on the size of your turkey, you may not need the full half cup of salt. Place uncovered in the refrigerator for 24 hours. Most turkeys have the neck and giblets (liver, heart, and gizzard) tucked into the cavity of the bird. Be sure to remove them prior to putting the dry brined turkey back into the refrigerator. The neck can be used to make turkey stock and gravy, and the giblets can be cooked separately and added to gravy or just eaten, if they are to your liking.


While the turkey is dry brining, we will prepare an herb butter, which will help flavor the breast meat and also protect it from the initial high heat. Mix one stick of softened butter with an assortment of dried herbs—1 tablespoon each of sage, rosemary, parsley, and thyme. The herb butter can be made in advance of the roast, and kept chilled in the refrigerator until use.

Ingredients
1 dry brined turkey
8 oz herb butter
2 tbsp vegetable oil
1 tbsp baking soda
1 onion
1 apple
3 sprigs sage
5 sprigs thyme
1 orange
1 tbsp honey
2 tbsp butter
On the day of the roast, preheat the oven to 500° F, and retrieve the dry brined turkey from the refrigerator. You will notice that the meat has darkened slightly in color, and the skin is drier than before. Place the turkey into a roasting tray, on a roasting rack. The roasting rack is important because it allows hot air to move underneath the bird, resulting in more even cooking. If you don’t have a roasting rack, you can construct an ad hoc one by forming several tinfoil snakes for the bird to rest on.

We now have to introduce the herb butter to the turkey breast. Using clean fingers, gently loosen the skin around the turkey, particularly over the breasts and thighs of the bird, being careful not to break the skin. The breast can be approached from both the neck cavity and the main cavity. Stuff as much of the herb butter as you can between the meat and the skin. I often find that it is easiest to pack a chunk of butter under the skin, and then spread the butter out by pressing the chunk of butter flat from outside the turkey.
This process should use about half of the herb butter. Rub the remaining butter over the turkey, prioritizing the breast skin. This will help protect the white meat during the initial high heat roast.
The butter should solidify quickly upon contact with the cold turkey. The next step is to mix the baking soda with vegetable oil to form a slurry. Be sure you are using a vegetable oil with a high smoke point for this—my personal preference for high temperature roasting is avocado oil, which has a smoke point of 520° F, one of the highest among commonly available cooking oils. Oil will help the heat move into the skin quickly, and, as mentioned previously, the baking soda increases the pH of the skin which reduces the temperature at which browning reactions occur, helping us cook the skin effectively over a wider range of temperatures.
We will not be stuffing this turkey. Why? Because, as Alton Brown was so fond of saying, “Stuffing [birds] is evil!” By packing the cavity of the bird full of dense material, we eliminate the ability for hot air to circulate through the cavity, resulting in less even cooking time and a longer cooking time for the bird. What’s more, because the stuffing comes into contact with raw poultry juices, it must be cooked to 165° F, by the time the stuffing is safe to eat, the turkey surrounding it will be overcooked. By cooking stuffing in a separate tray, we are able to cook both the bird and the stuffing more effectively.
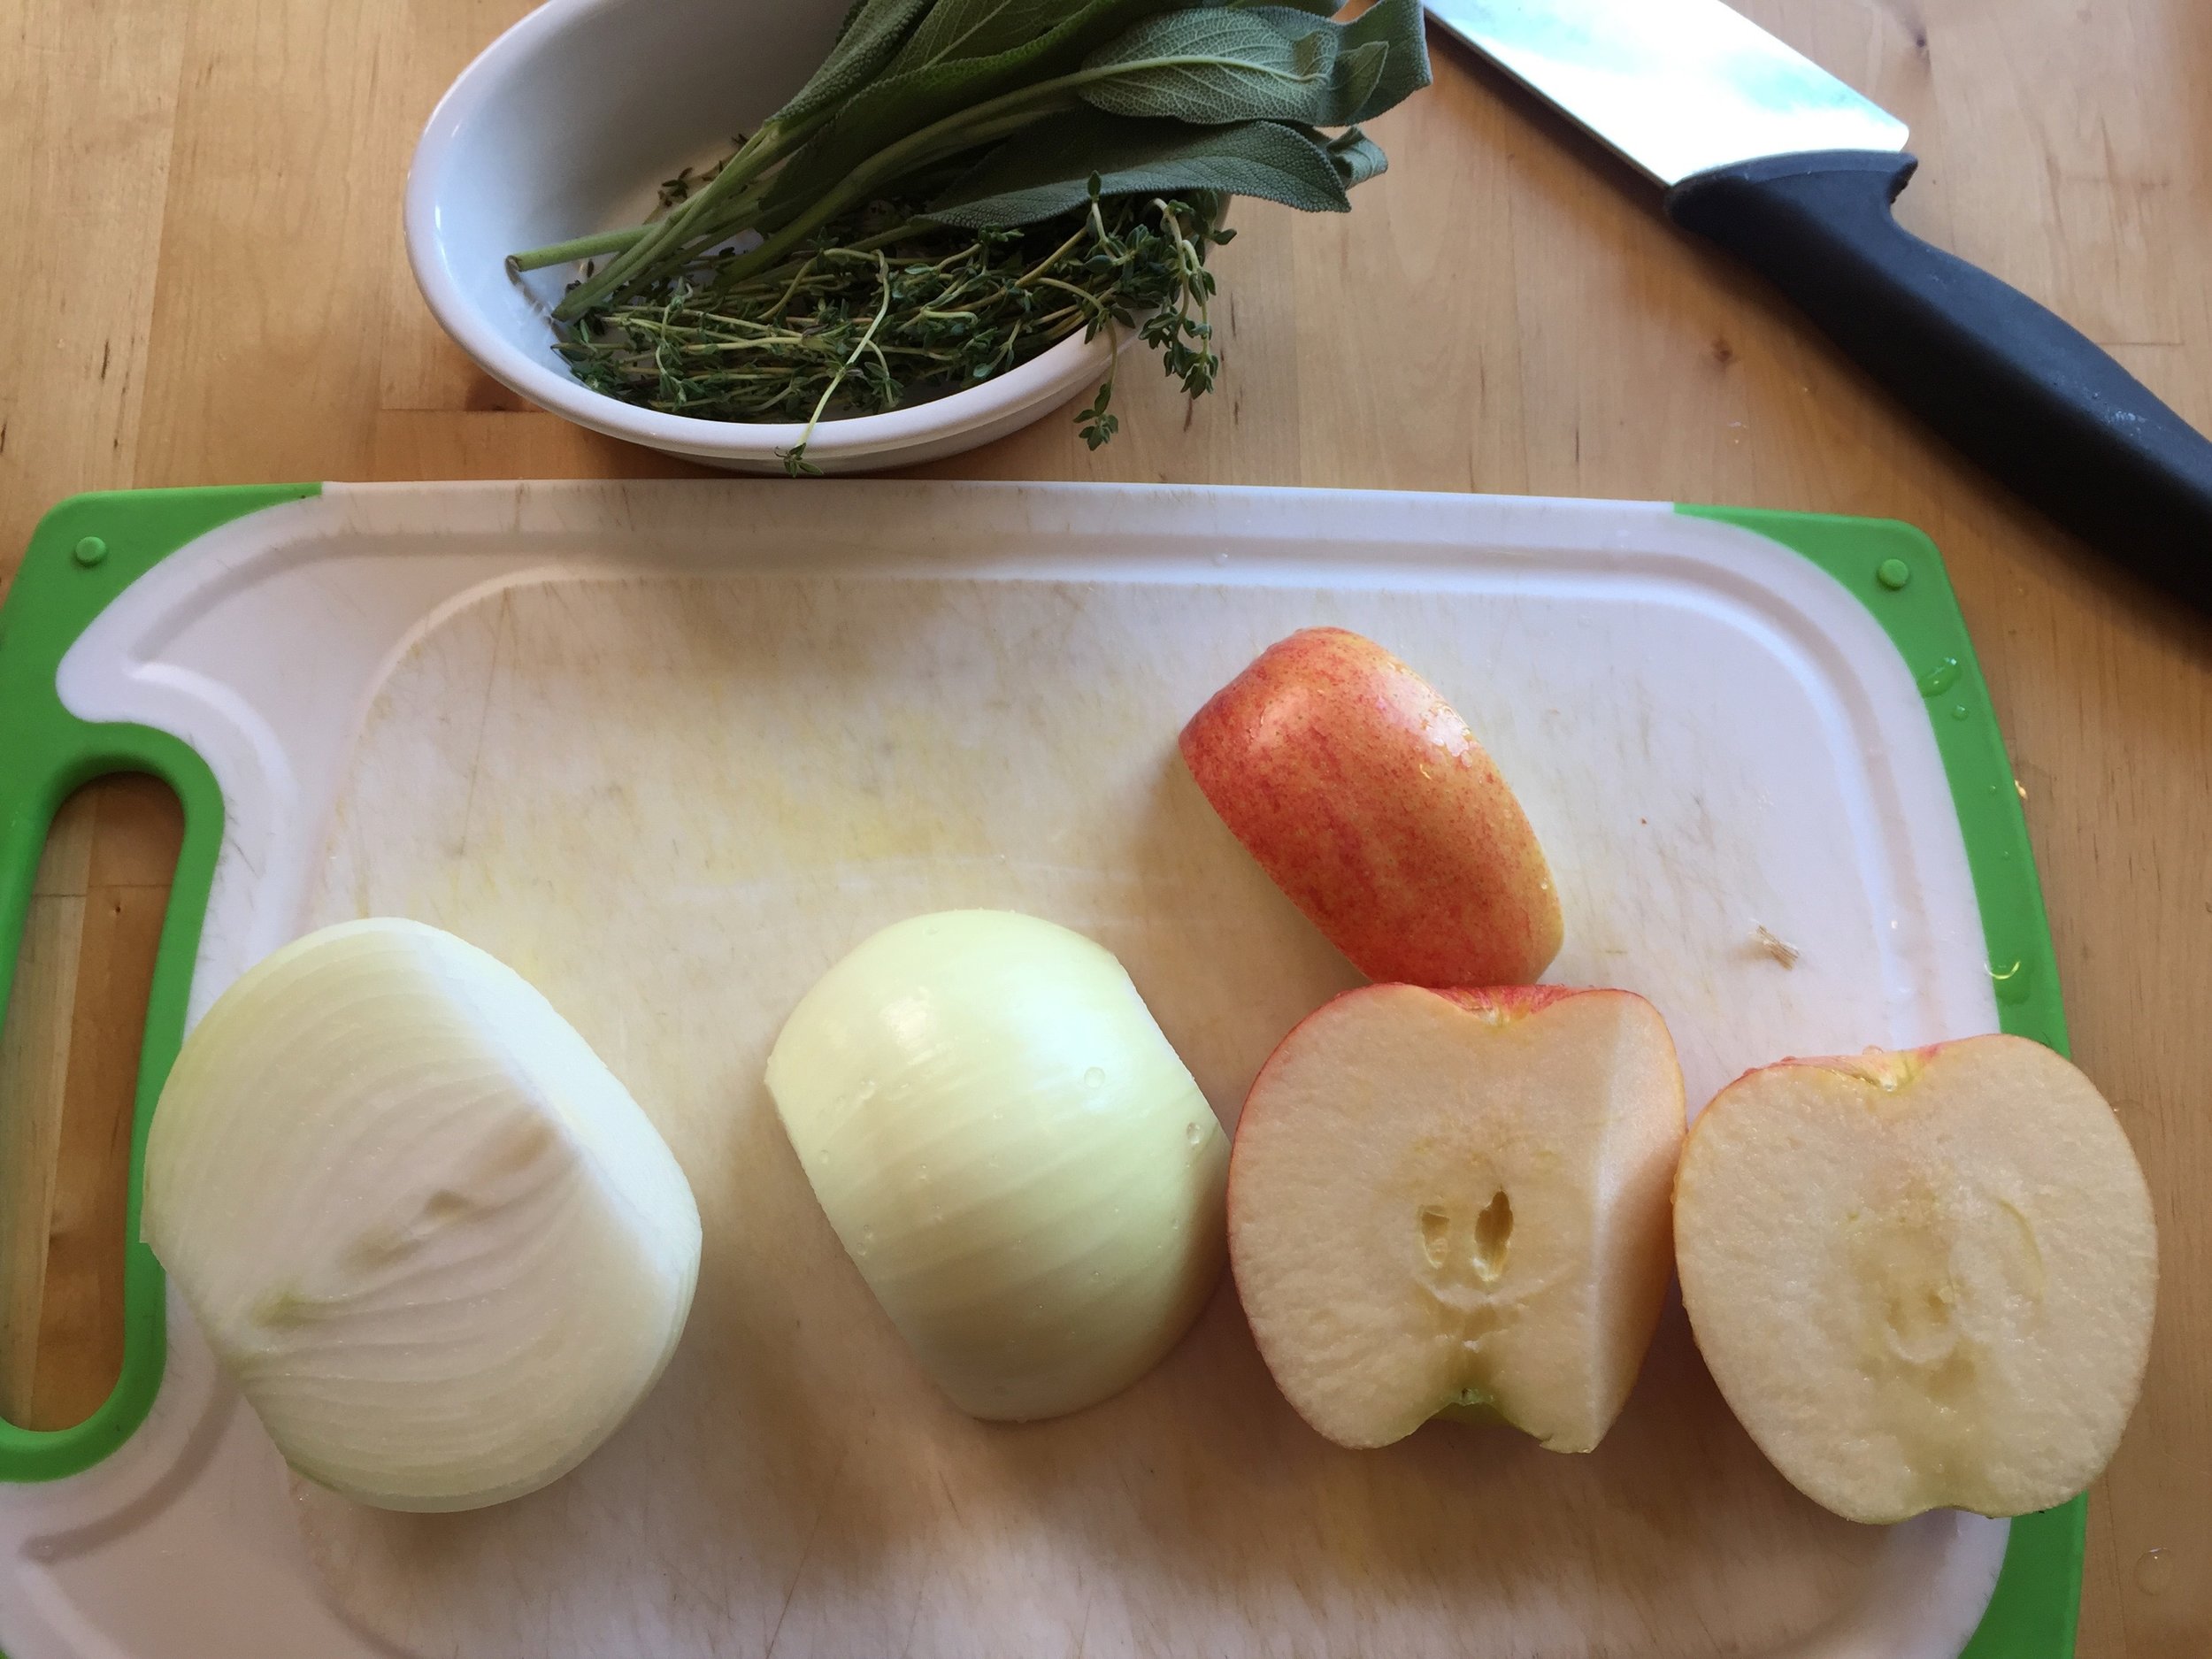
However, we can exploit the cavity by placing within some aromatics and herbs which will help flavor the bird. In this recipe, we are going with an apple, an onion, and some fresh sage and thyme. Simply halve the apple and onion, and “stuff” these aromatics into the cavity.

Truss the legs of the turkey together with butcher’s twine, and prepare to roast. When roasting meat, cooking to time is notoriously inaccurate—you should always be cooking to temperature. Insert your probe thermometer into the thickest part of the breast of the turkey, being sure not to hit bone, which will give you an inaccurate reading.


Place the turkey on the lowest rack of your oven. Once the oven door is closed, drop the oven temperature to 300° F. The heat in the oven will drop gradually, giving us approximately 30 minutes or so of high temperature cooking. In general, it is not a good idea to open the oven door unnecessarily while cooking anything, but in this case it is important to keep the oven door closed during this time, so that the heat doesn’t escape. Until the glazing phase, the oven door stays closed! The total cook time should be somewhere in the neighborhood of 3 hours, but will vary depending on your oven and the size of your bird.
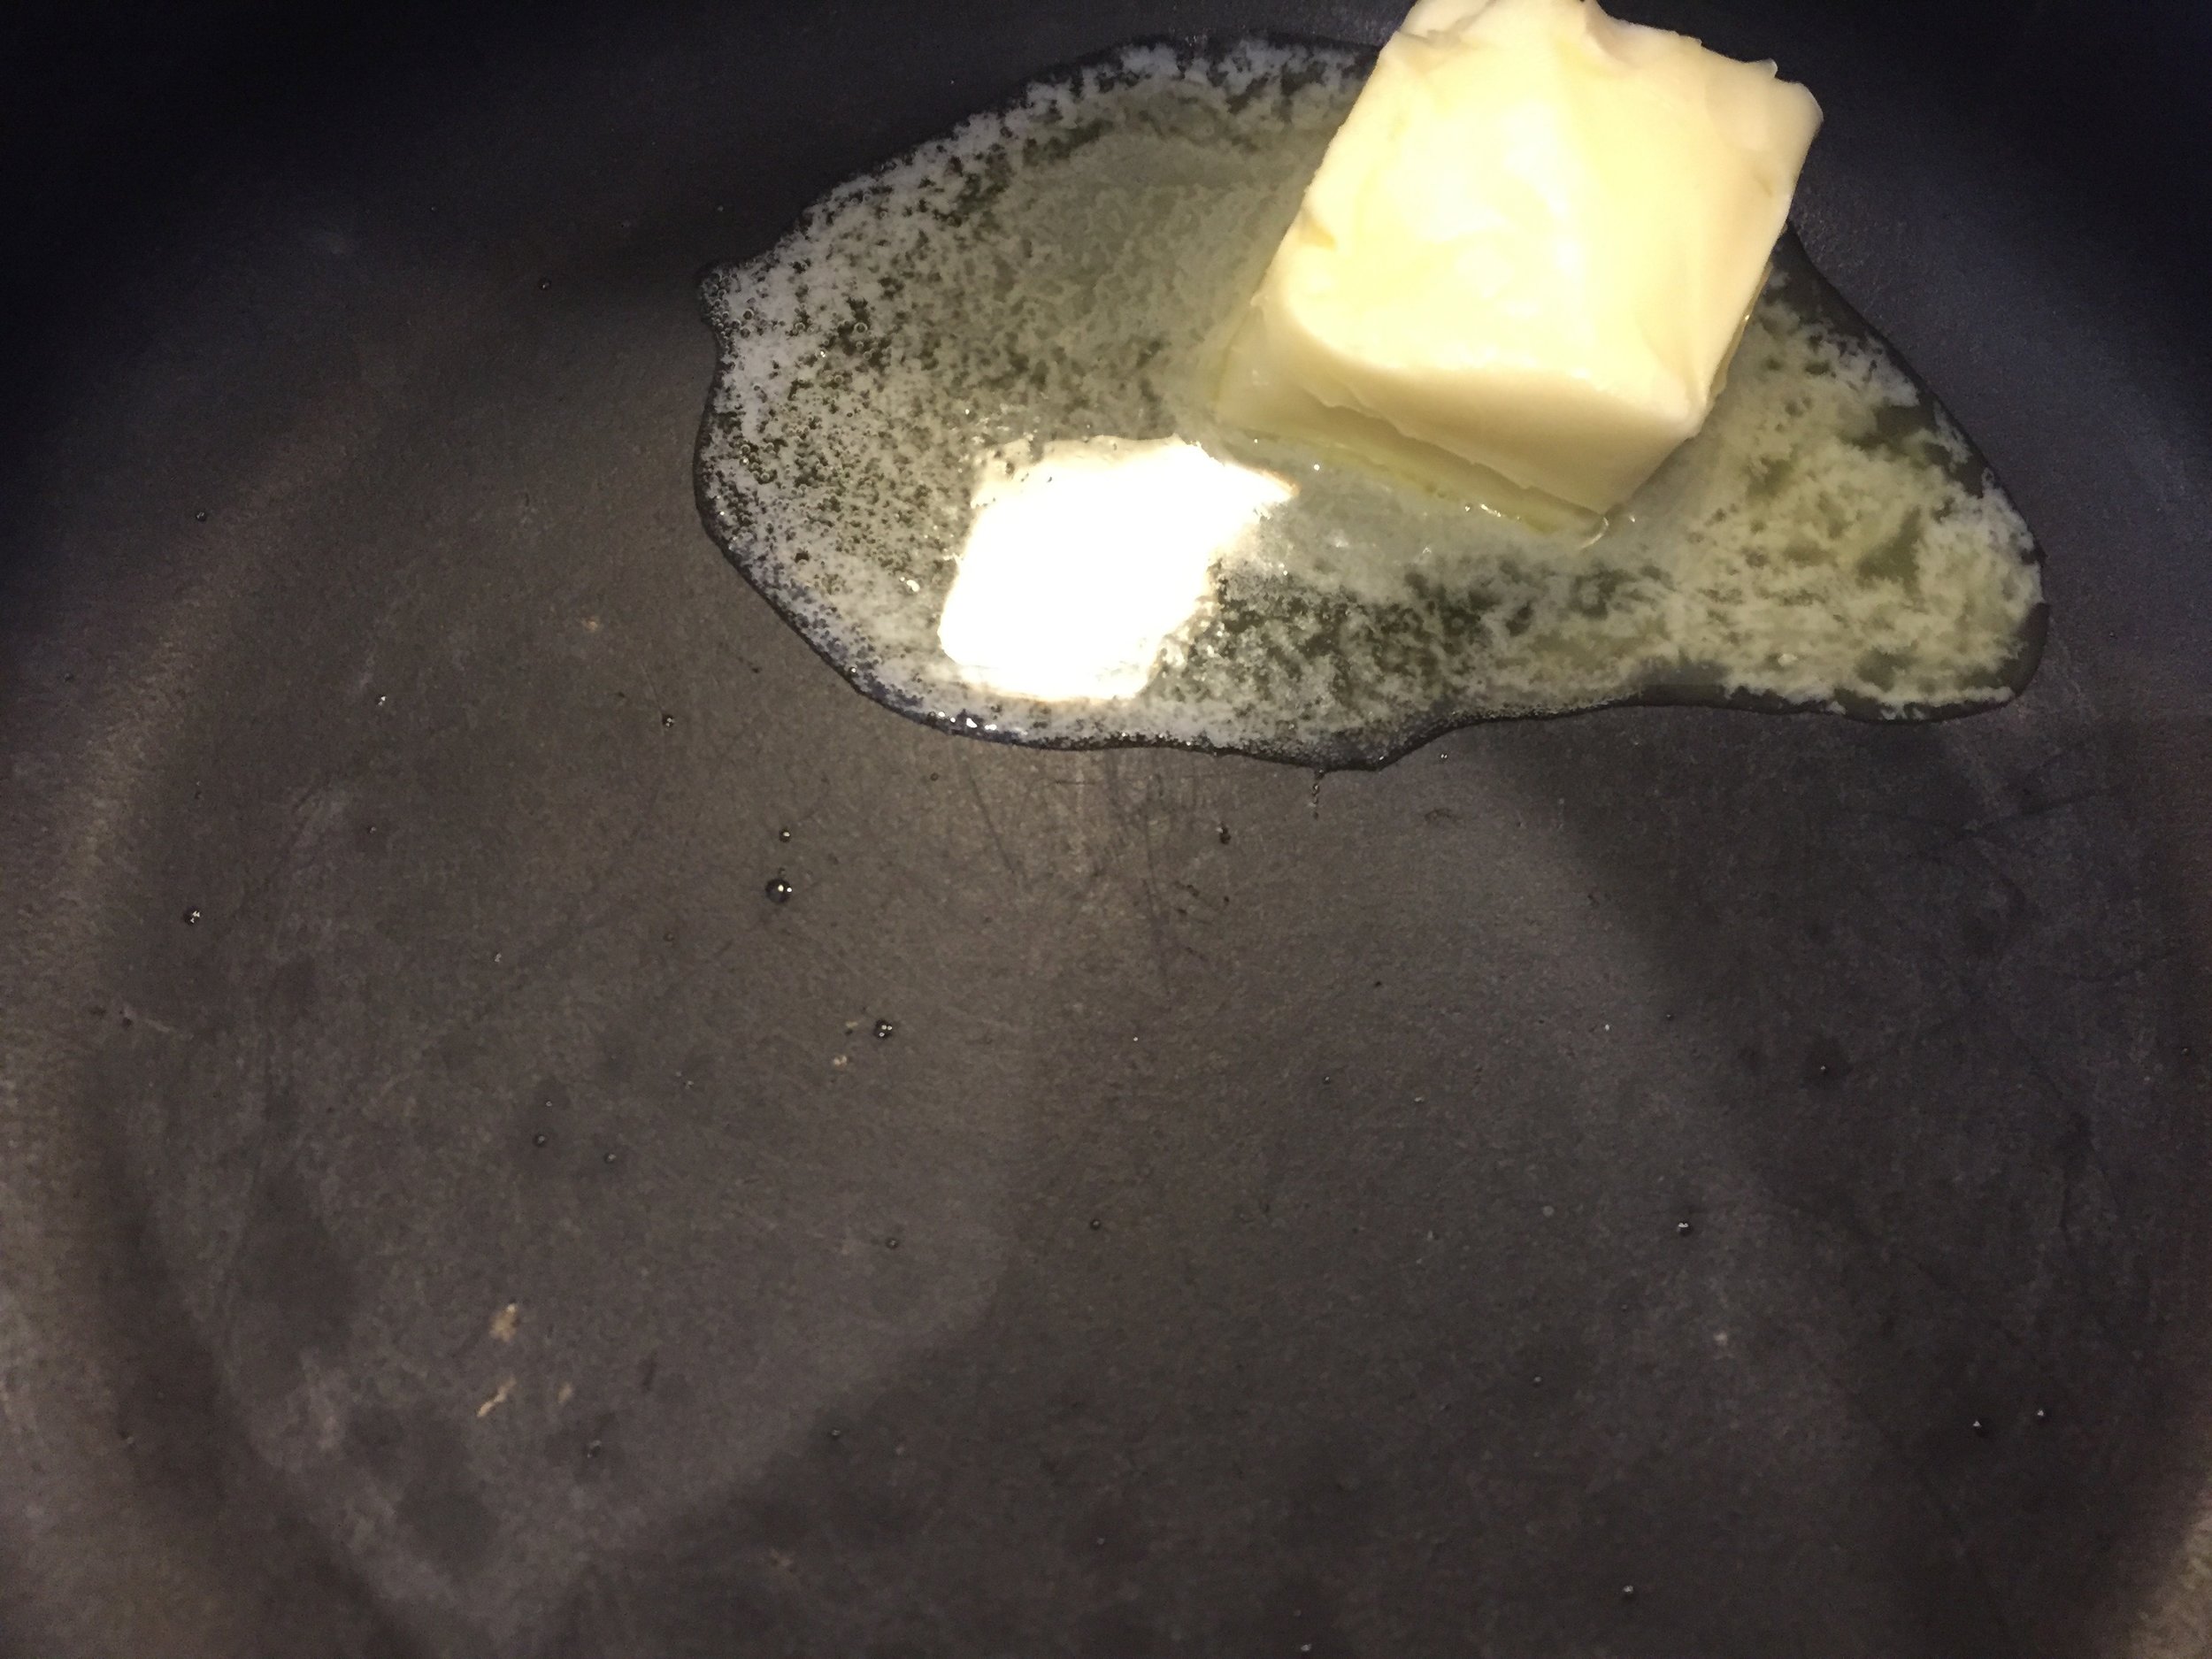


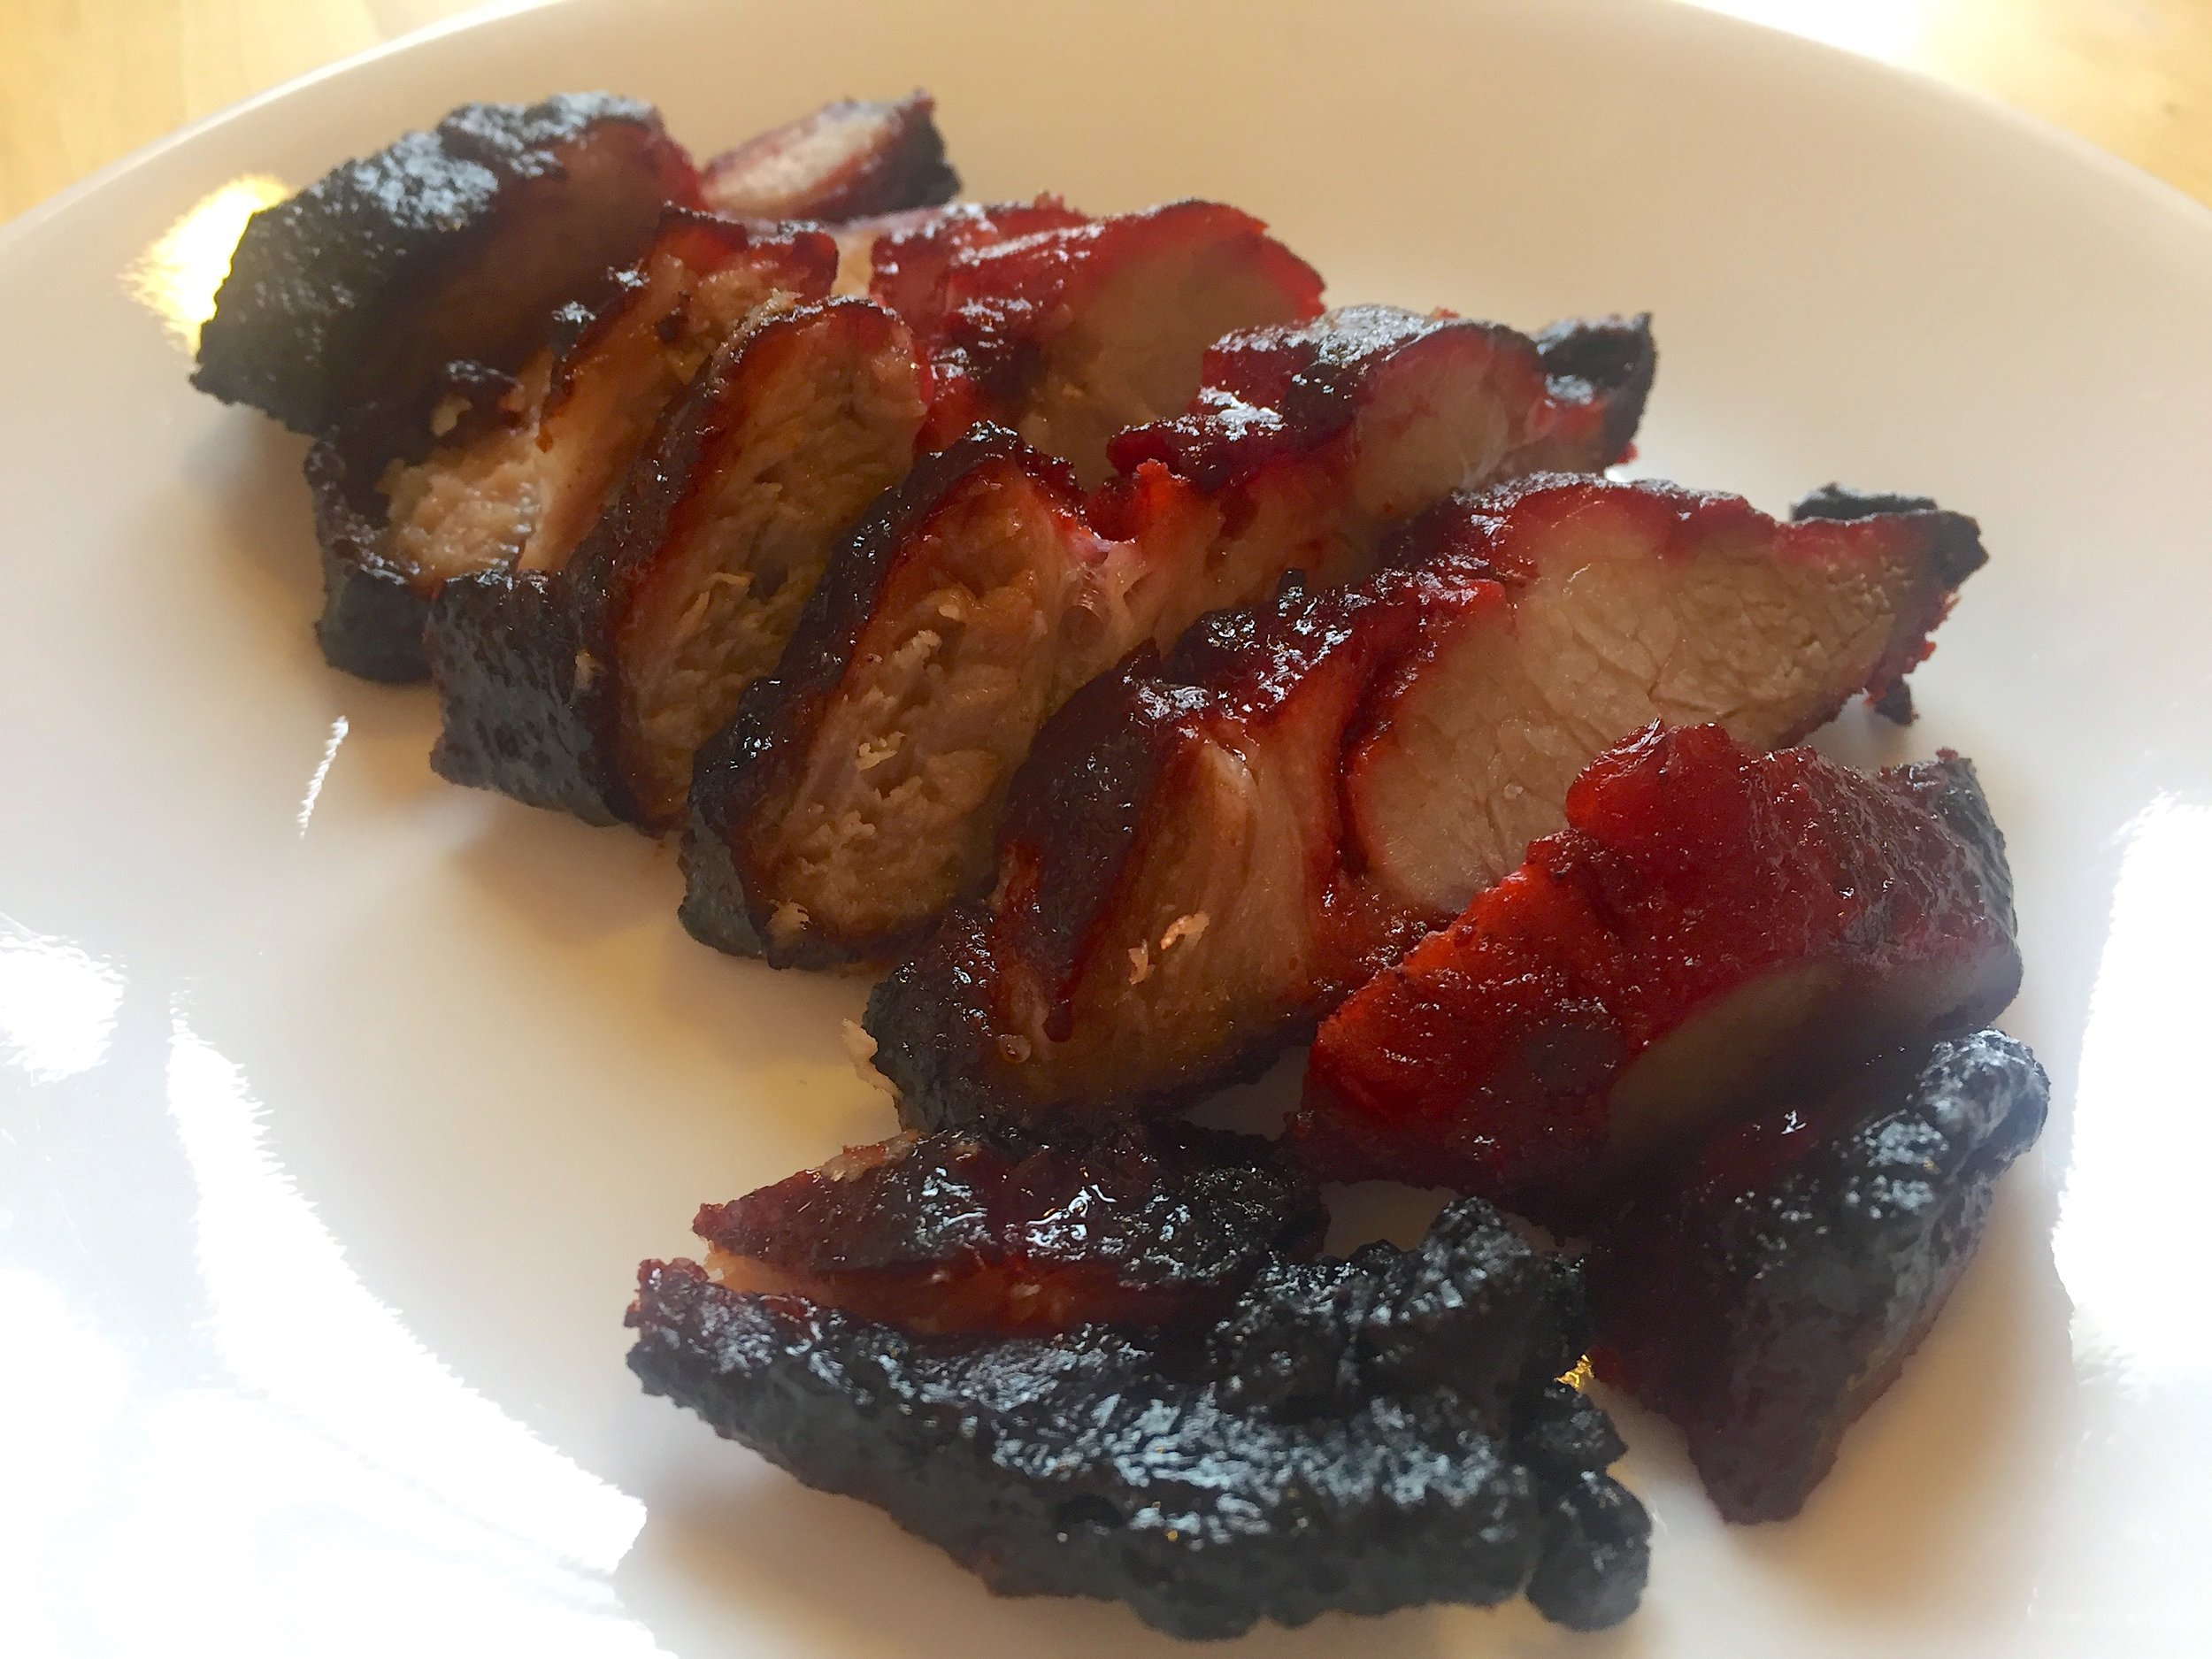
While the turkey roasts in the oven, let us prepare our glaze. We will apply the glaze towards the end of the cook, so that the sugar in the glaze has time to caramelize, but not burn. Melt 2 tablespoons of butter in a saucepan over medium heat, stir in honey and the juice from one orange, and season with salt. Simmer until the glaze reduces slightly and turns glossy, about 5 minutes. Remove the glaze from the heat and let it cool.
When the internal temperature of the turkey hits 125° F, which should happen somewhere around the 2 hour mark, use a basting brush to glaze the turkey. It may also be a good time to rotate the turkey if your oven heats unevenly. If the breast of the turkey looks like it has browned sufficiently, you can cover the breast with a triangle of aluminum foil.

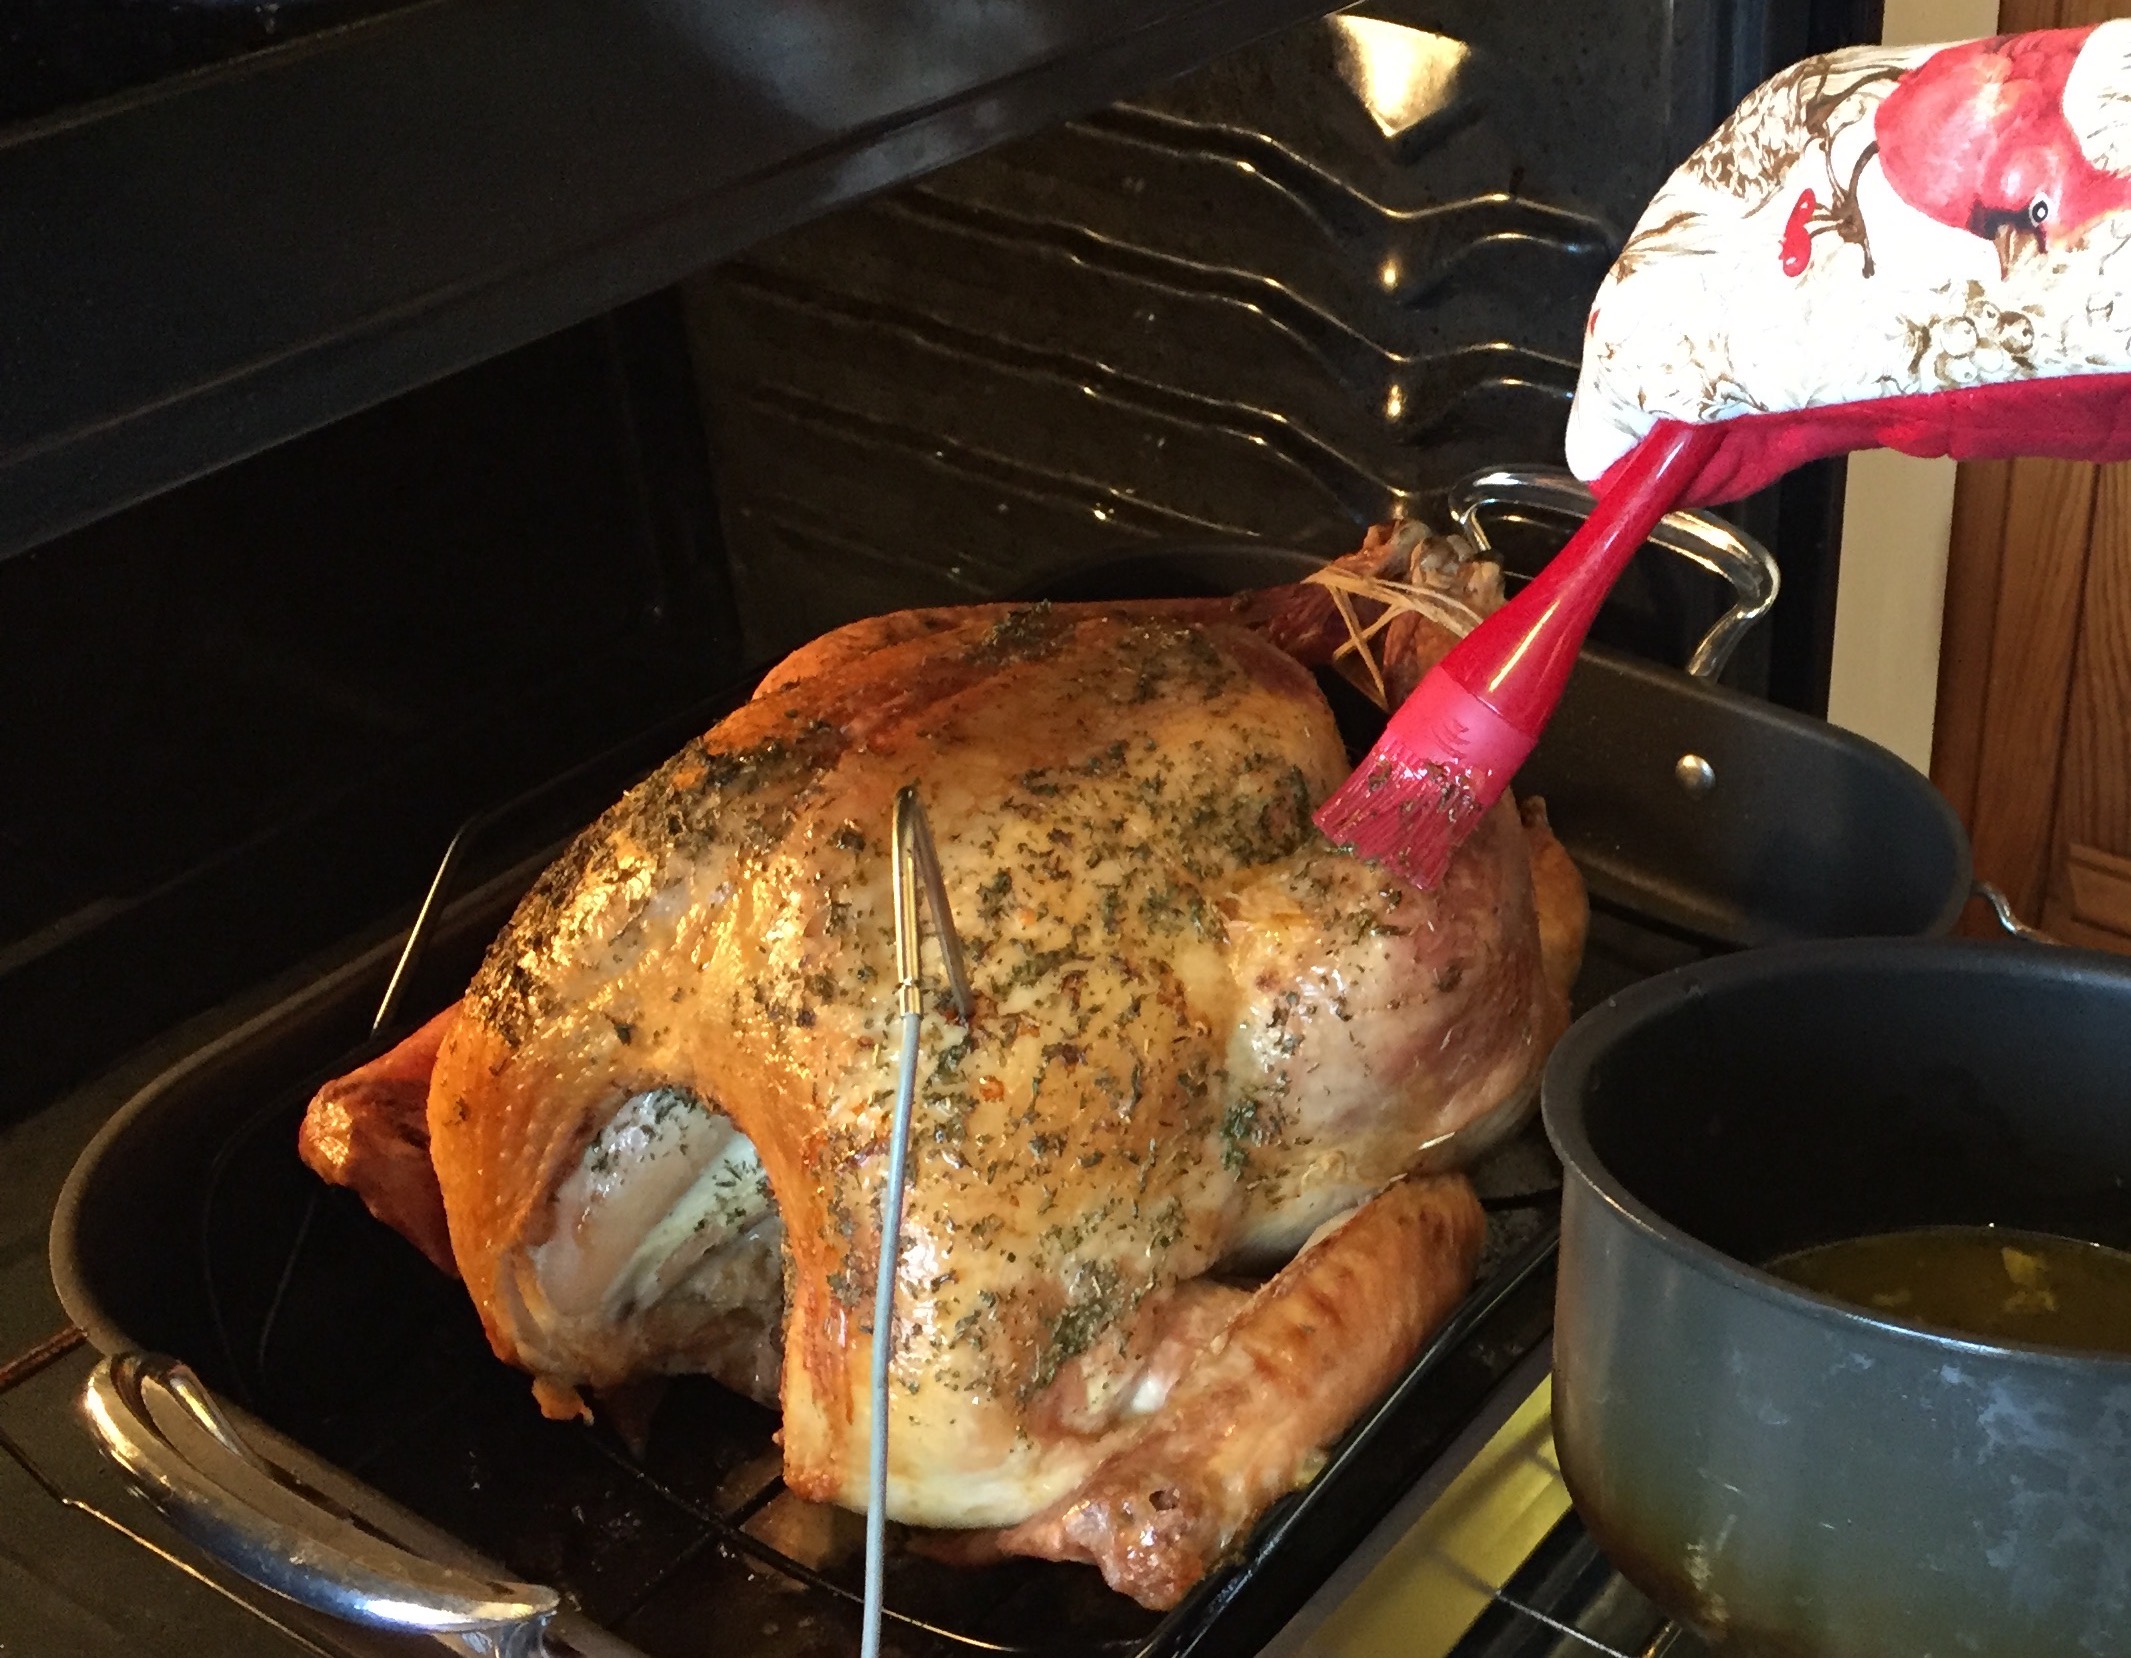

Pull the turkey out of the oven when the temperature of the breast reads 150° F, and the legs read 165° F—the temperature will continue to rise for many minutes due to residual heat, and the temperature of the white meat will coast gently to 165° F.[4]

Now that the bird is out of the oven, we’re almost done. There remains just one last step—the rest. Some will say to rest cooked meat for at least 20 minutes, whatever the meat in question is—steak, rack of lamb, turkey. Another approach common among chefs is to rest a piece of meat for as long as it’s been cooked. There is also a great deal of controversy over whether meats cooked over high heat—steaks in particular—should rest or not, the tradeoff being one of moisture retention versus a less precise final temperature and loss of exterior texture.[5]
We are not going into the finer points of resting here, but the rapid-fire version for the specific case of this turkey is as follows. What humans perceive as juiciness is related not just to the moisture content, but also to the distribution of this moisture amongst the muscle fibers of the meat. Furthermore, this moisture can come in multiple forms: water, melted fat, and dissolved collagen. In the legs and thighs of the turkey, where there is a higher fat content and also a fair amount of collagen, which will ensure that the dark meat remains juicy over a wide range of temperatures. However, the white breast meat, is (despite our best efforts) very lean, and this roast was not long enough to significantly break down any connective tissue into collagen (not that there is any connective tissue in the breast to begin with). This means that we are relying almost entirely on water to make the turkey juicy—the most fickle of the three sources of moisture in meat.
By the time we pull the bird from the oven, the amount of water we have left is already determined—that half the juiciness battle is over, fought (and hopefully won) by our dry brine and careful temperature control. Resting the meat has more to do with redistributing the moisture and making sure the muscle fibers hold on to as much as possible. By resting the meat, we allow the muscle fibers to relax slightly, reabsorbing much of the water. This means that this precious moisture stays in the slice of turkey breast, rather than spilling onto the platter when carving.
This relaxation is not directly a function of time, but rather a function of temperature, hence the common chef’s saying. The larger the piece of meat (and the lower its surface area to mass ratio), the longer it needs to rest. The ideal temperature to reach when a rest is completed is around 120° F. Depending on the weight of your bird and the temperature and humidity of the ambient air, this should be somewhere between 1-2 hours. Let the turkey rest uncovered, to avoid condensation which would soften the crisp skin we have worked so hard to create. Also, keep the probe thermometer in the bird, to more closely monitor the internal temperature.
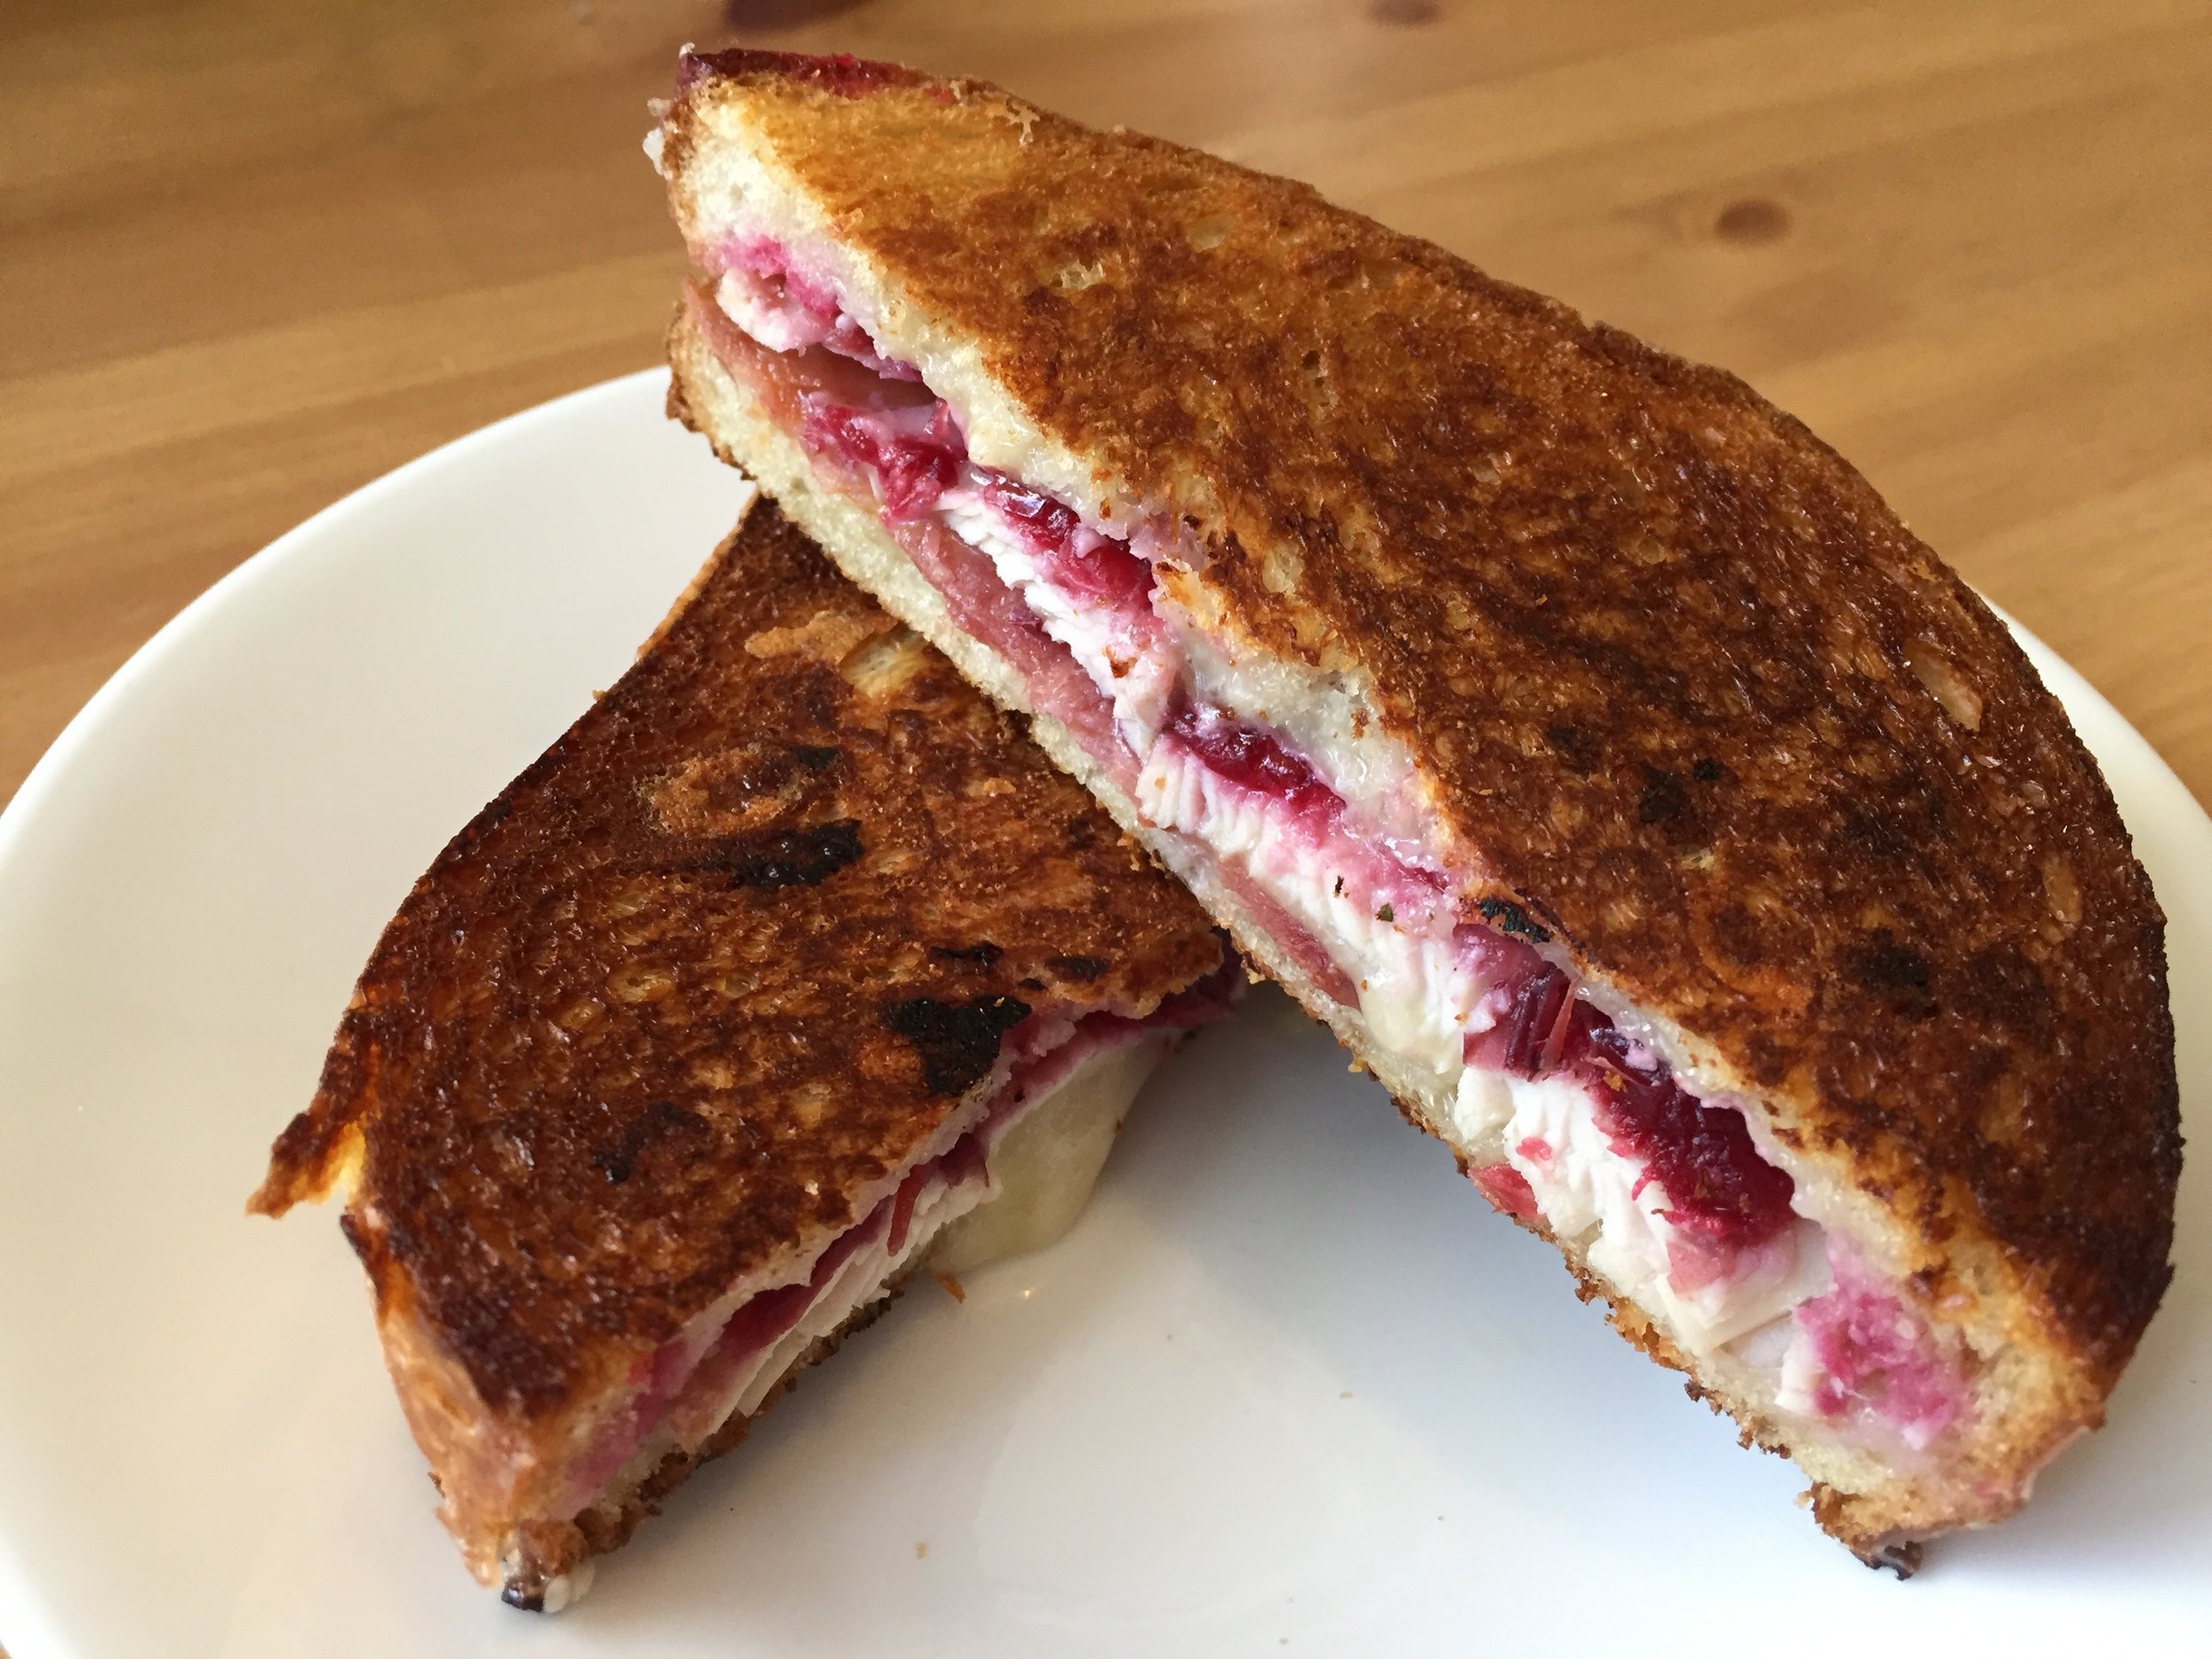
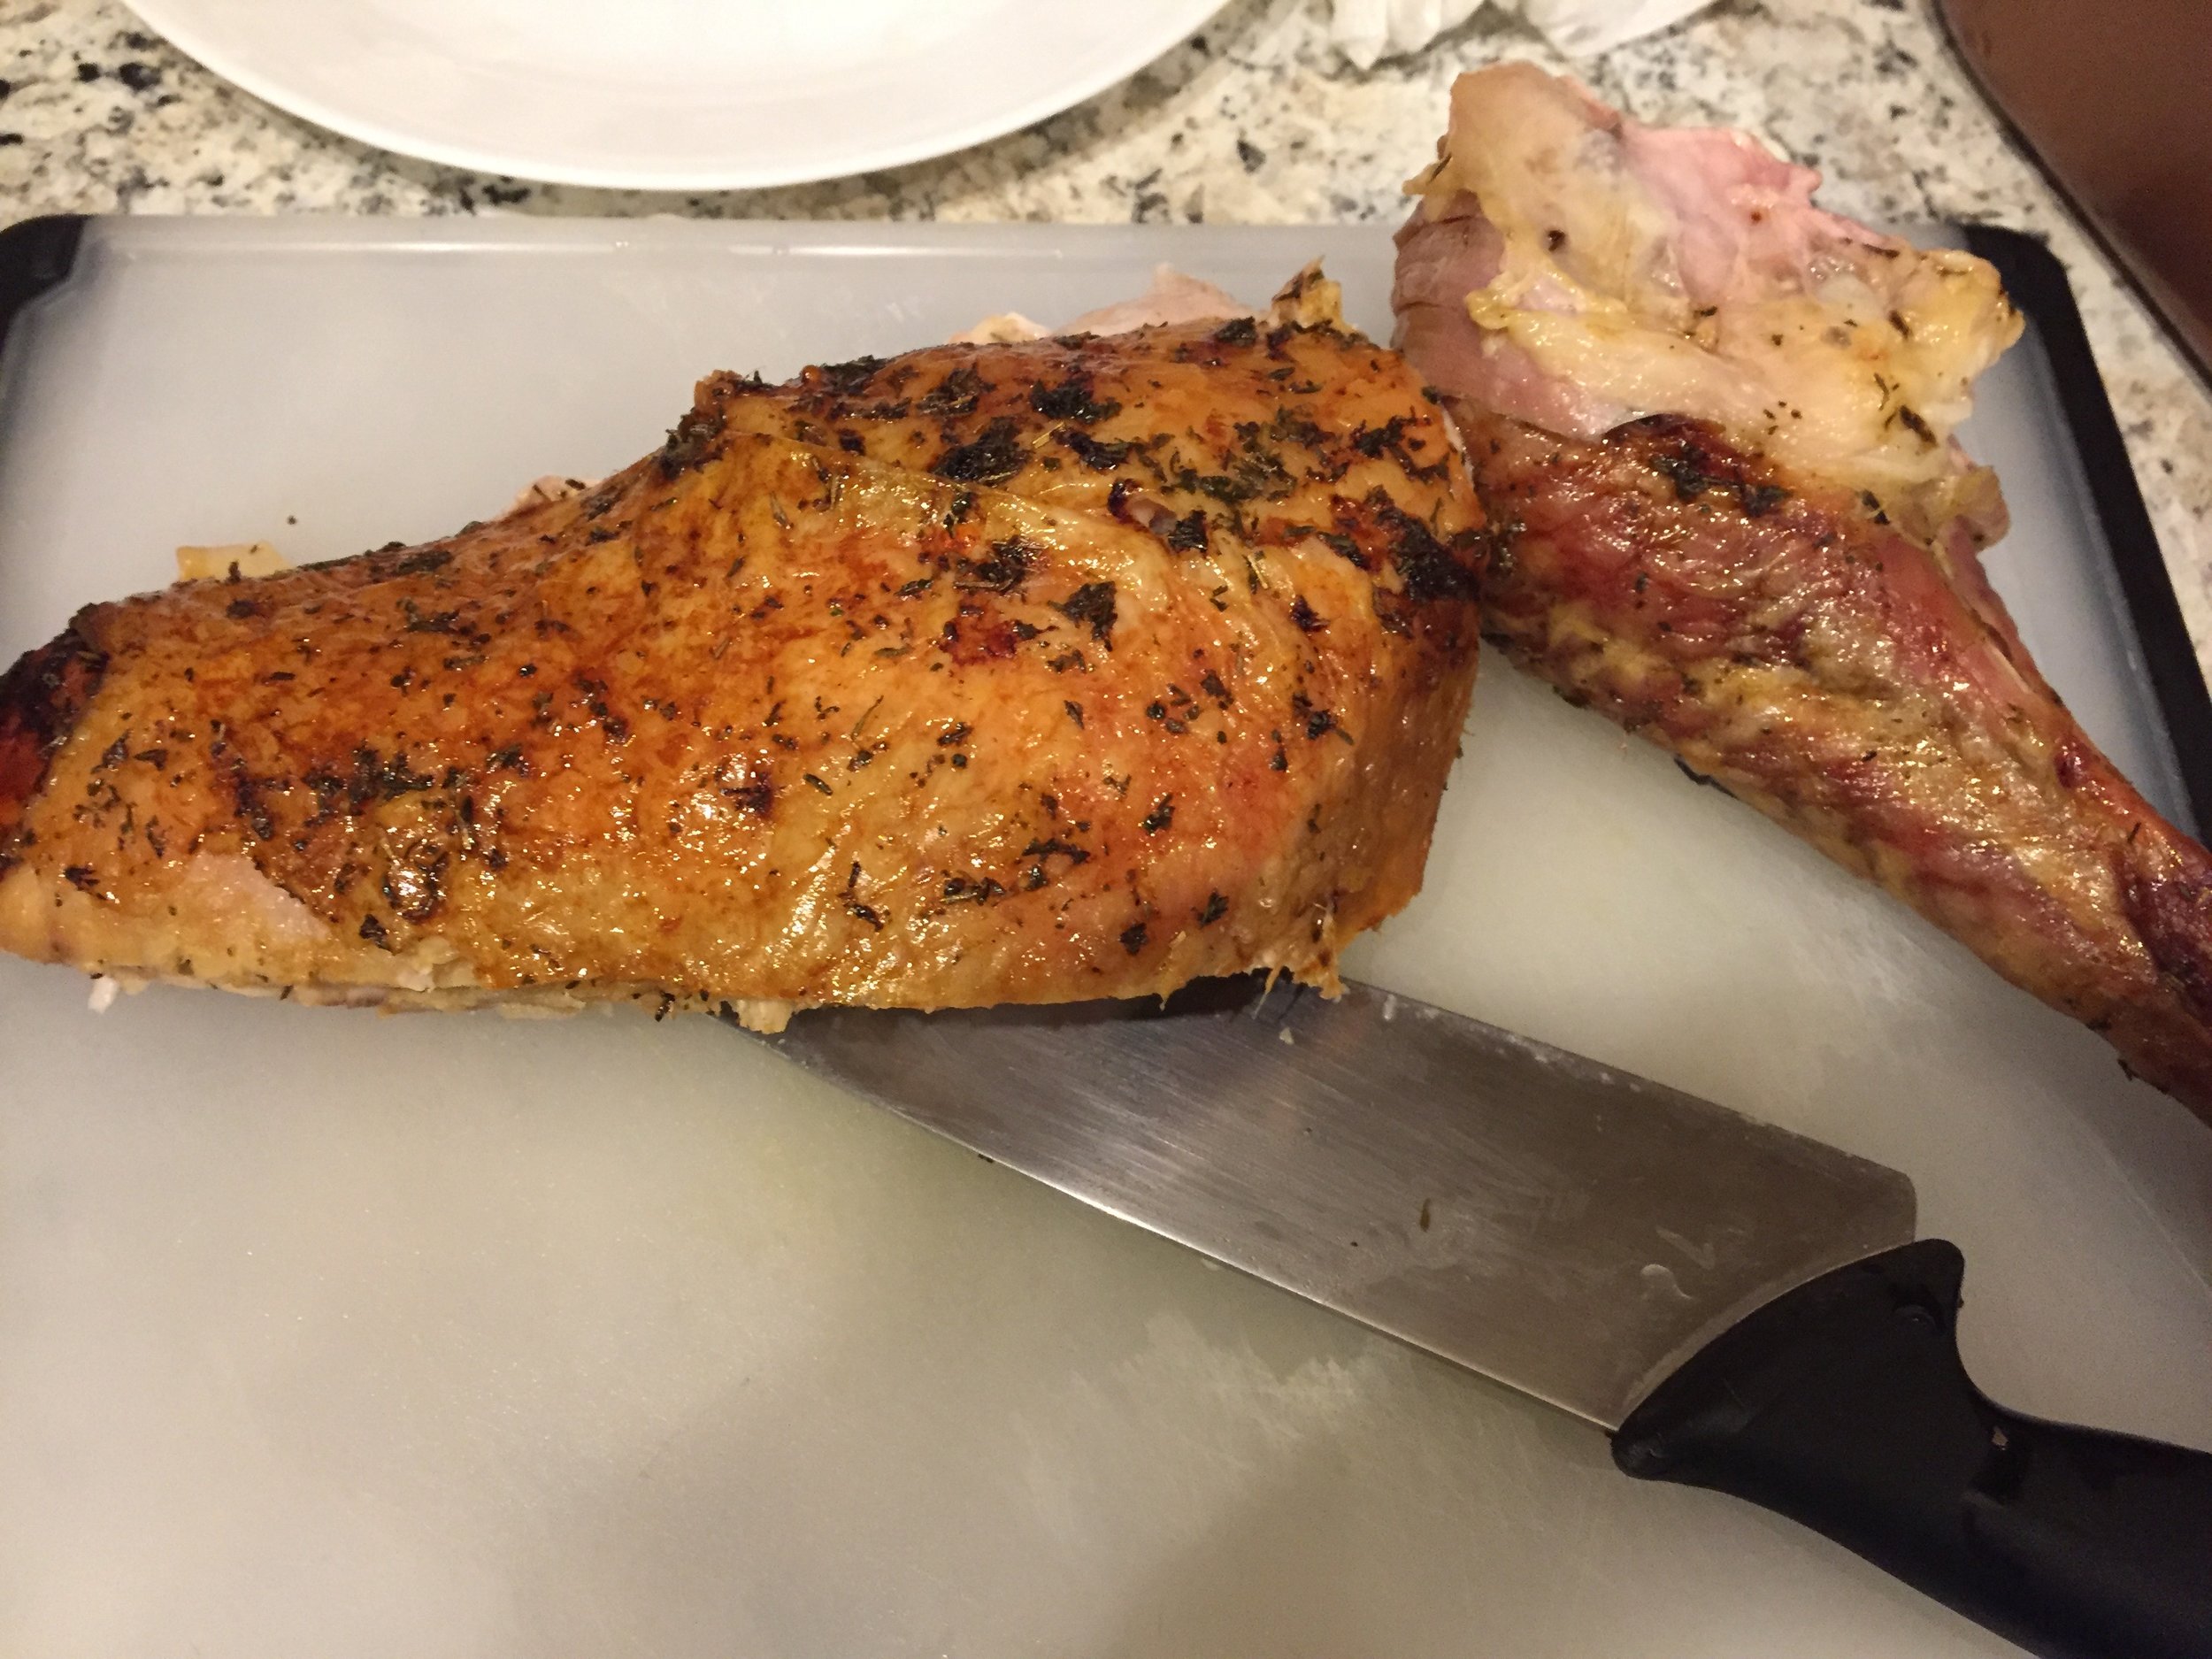
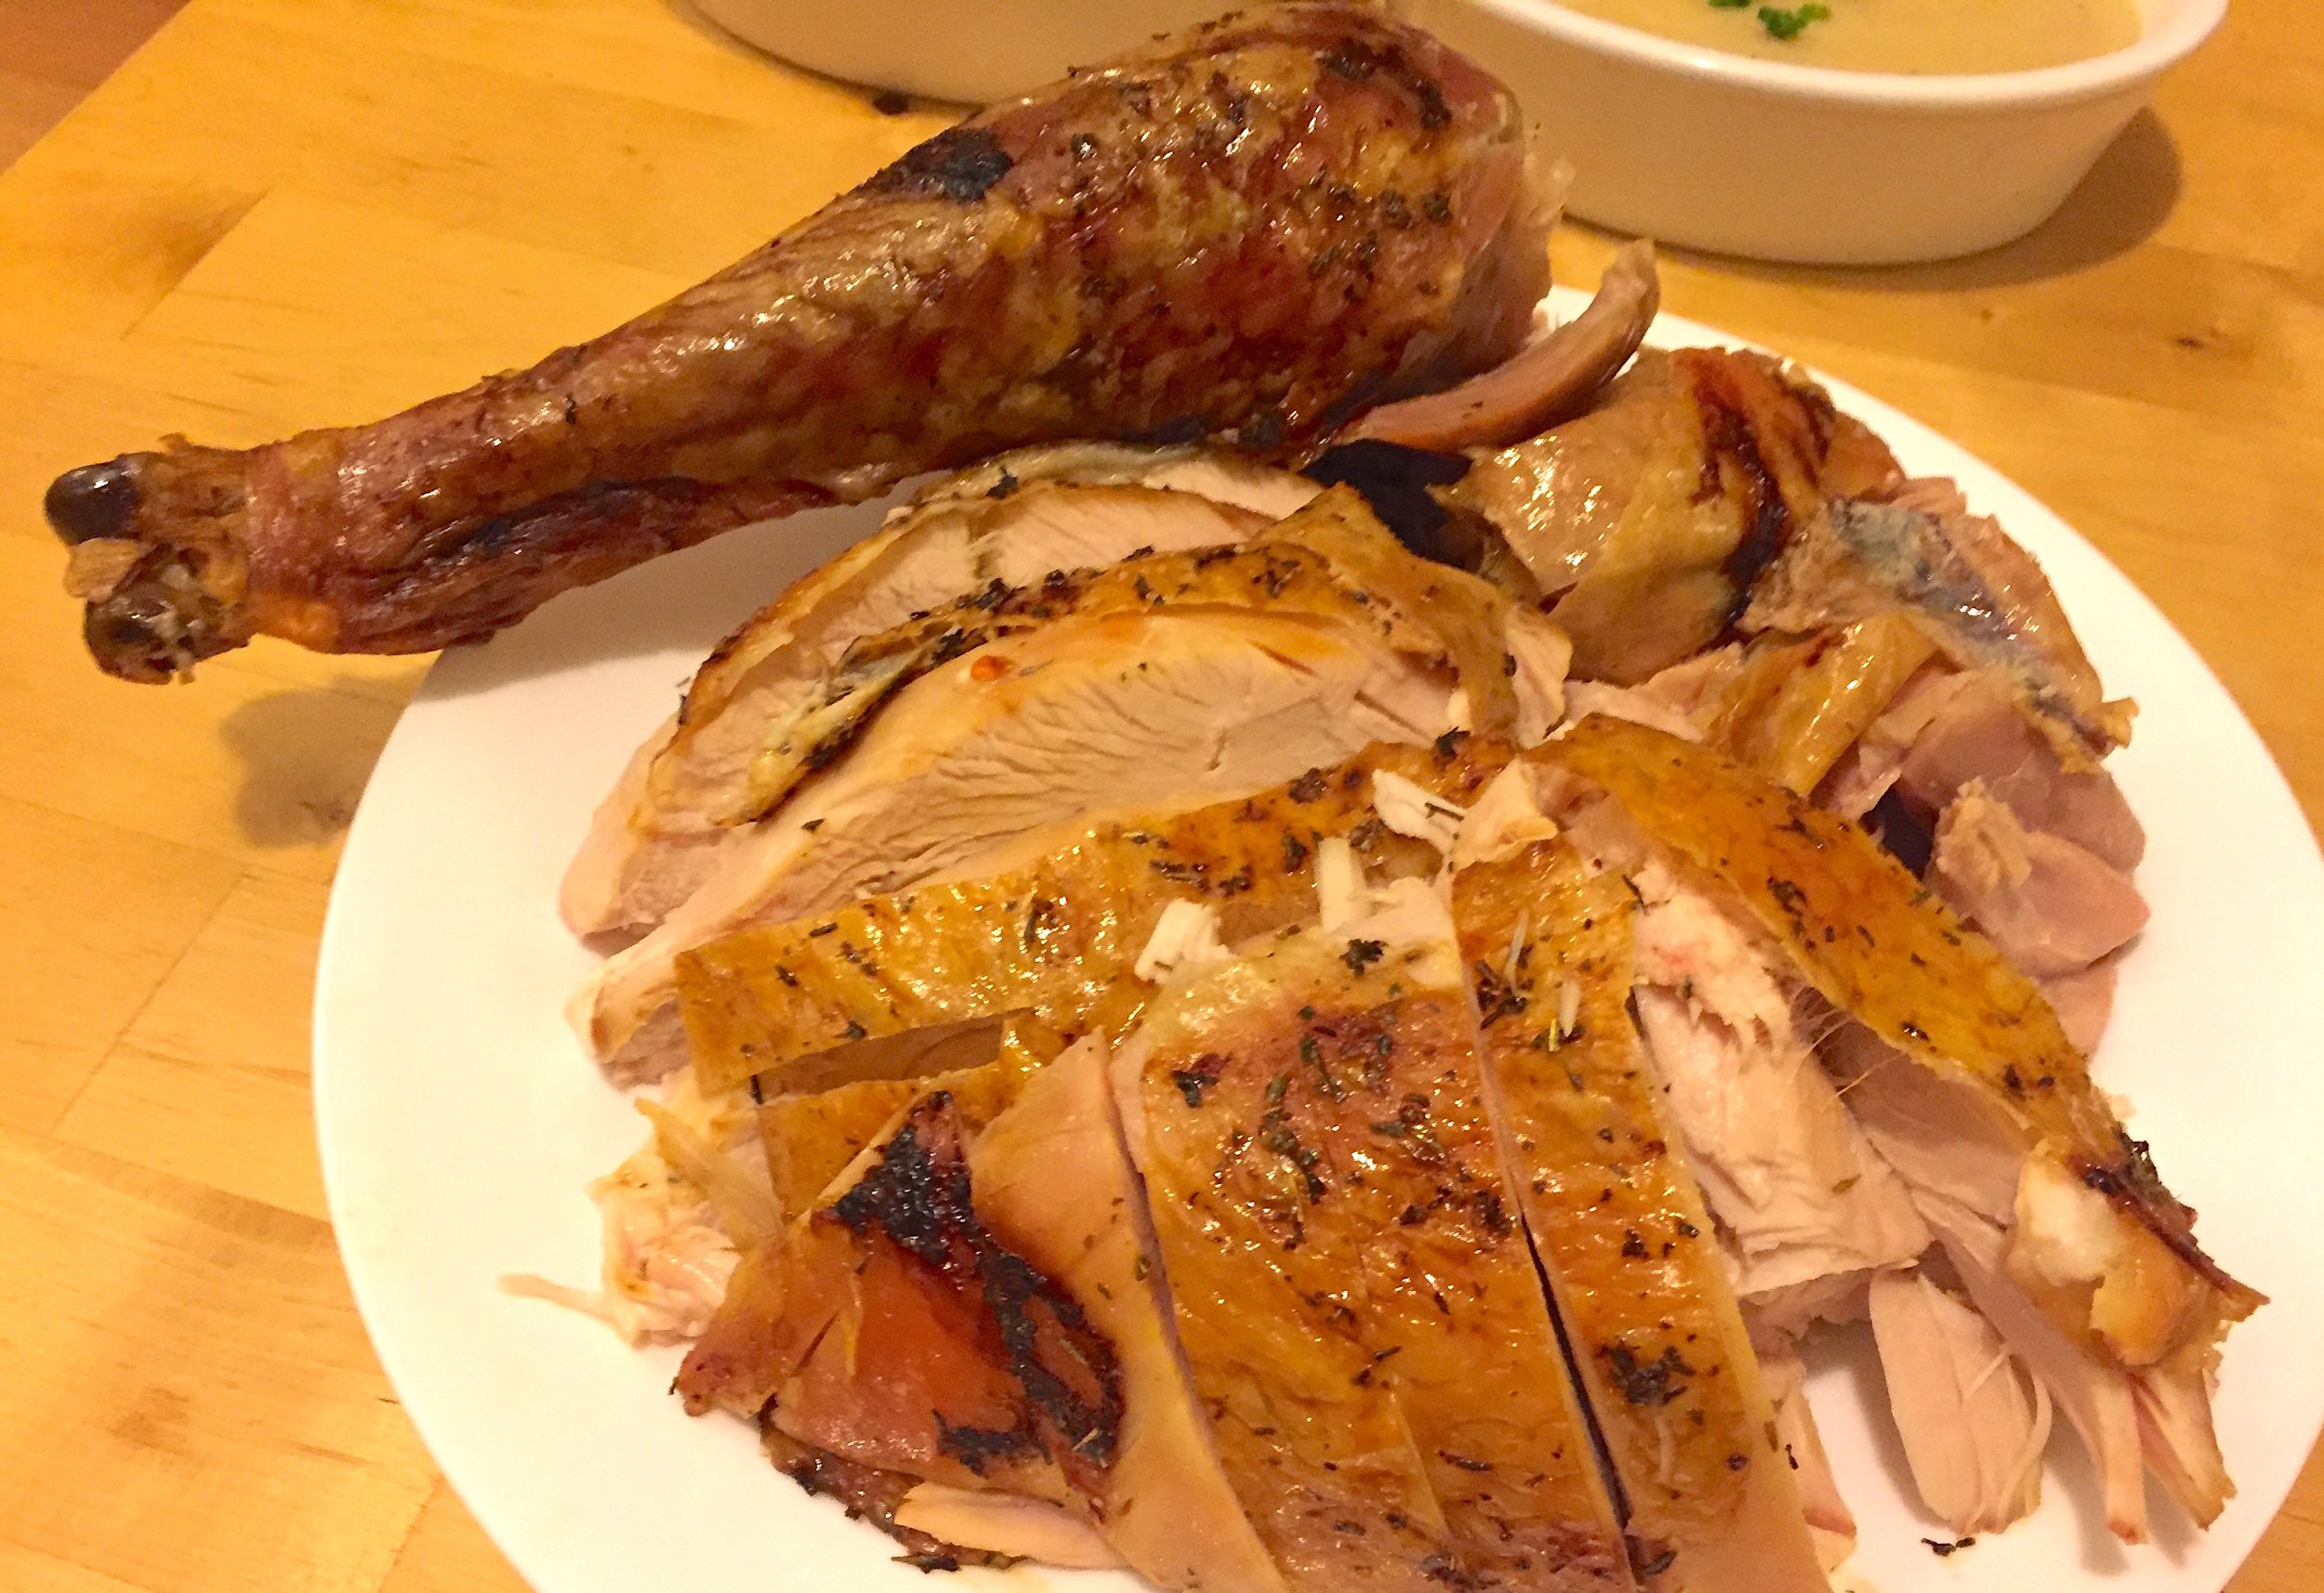
A quick word on carving a turkey—the only real reason to roast the turkey whole is to present the whole bird at the table. However, carving the whole bird at a table crowded with people and other dishes usually doesn’t end well. So after taking some slices off the top of the breast so your guests can get started, I prefer to retreat to the kitchen to do the rest of the carving. A turkey is anatomically identical to a chicken, so carve the bird as you would a roast chicken, beginning by taking the entire breast off one side of the turkey. Once the breast is off, slice it thickly against the grain. Dark meat, which is juicier and denser, I prefer to serve shredded. take the leg off, which can be served whole or with the meat shredded, and shred the thigh meat. Repeat the procedure on the other half of the turkey. Serve with gravy and cranberry sauce.
Substitutions
As this is more of a techniques recipe, the flavors used here are open to modification. Feel free to use your favorite herbs or spices in the butter. You can also flavor the glaze differently, using different fruits, or maple syrup, or skip the glaze entirely, which will result in a bird with crisper skin but less color.
[1] In the United Kingdom, the turkey eventually supplanted the more traditional roast goose on Christmas, as with the advent of factory farming, turkey became the much cheaper bird—a tradition which spread through the British Empire.
[2] The name “turkey” likely comes from a double failure: European settlers incorrectly identified turkeys as a type of guineafowl, with they mistakenly believed were from Turkey (guineafowl are actually from Africa, but had been introduced to Europe by merchants from Constantinople). At the time, guineafowl were known as “Turkey fowl,” so turkeys were assigned that moniker too. When it became clear that turkeys were not guineafowl, Europeans began referring to the birds as “Indian turkey fowl,” as they were found in America, land of the Native American “Indians” (yet another incorrect assignment of identity). This eventually got shortened to “Indian turkey” and then finally just “turkey.”
[3] Kenji Lopez-Alt of the Food Lab has conducted a thorough series of experiments to compare the efficacy of brining, dry brining, and flavored brines. Read about this here.
[4] A detailed discussion of safe cooking temperatures for poultry can be found here.
[5] An in-depth article on the science behind resting meat can be found here, again by the incredible Kenji Lopez-Alt of the Food Lab.
Recipe
Prep Time: 1 hr Cook Time: 3 hrs Total Time: 4 hrs
(+24 hrs inactive) (2 days)
Difficulty: 4/5
Heat Sources: oven, 1 burner
Equipment: sheet pan, roasting rack, saucepan, basting brush, probe thermometer
Servings: 12
Ingredients
1 turkey (10-15 lb)
½ cup salt
For the Herb Butter
8 tbsp (1 stick) butter
1 tbsp dried sage
1 tbsp dried rosemary
1 tbsp dried thyme
1 tbsp dried parsley
For the Roast
2 tbsp vegetable oil
1 tbsp baking soda
1 onion
1 apple
3 sprigs sage
5 sprigs thyme
For the Glaze
1 orange
1 tbsp honey
2 tbsp butter
Instructions
1. Begin with the dry brine: pat the thawed turkey dry with paper towels, then sprinkle salt evenly over all the surfaces of the bird. Refrigerate uncovered for 24 hours.
2. On the day of the roast, make an herb butter by mixing 8 oz of soften butter with 1 tbsp each of dried sage, rosemary, parsley, and thyme.
3. Preheat the oven to 500° F and retrieve the turkey. Use your fingers to loosen the skin over the breast and thighs of the bird, and pack as much herb butter as you can underneath the skin. Rub the remaining butter over the breast skin to help protect the white meat.
4. Mix the baking soda with the canola oil to form a slurry, and rub all surfaces of the turkey with the mixture.
5. Halve the onion and apple, and place them in the cavity of the turkey, together with sprigs of fresh sage and rosemary.
6. Place the turkey into the oven, and immediately drop the oven temperature to 300 F.
7. While the turkey is roasting, prepare the glaze. In a small saucepan over medium heat, melt 2 tbsp of butter, and combine the juice of the orange with the honey, and salt. Simmer for about five minutes until glossy, then set aside.
8. When the internal temperature of the turkey reaches 125° F, baste the turkey with the glaze.
9. Continue roasting until the turkey breast reaches a temperature of 150° F and the legs reach 165° F. Remove from the oven and let the turkey rest uncovered at least 1 hour.
10. Carve and serve.