Duck Confit

Confit de Canard
Duck confit—salt-cured duck gently poached in its own fat—is an iconic French dish. Meltingly tender, well-seasoned meat paired with shatteringly crispy skin is a winning combination. The confit method likely dates back to ancient times. After all, the most readily available cooking liquid for a cut of meat is probably the fat from the same animal. In the centuries before refrigeration, confit was one of the best methods for preserving meat.[1] The salt cure drove away microbes, and entombing the meat in solidified fat after cooking prevented spoilage by shielding the meat from air. In a cool cellar, confit could be safely stored for many months.
In the Renaissance, as more modern farming techniques led to the proliferation of higher-yield agriculture in Europe, rendered animal fats began to be replaced in many regions by butter or olive oil as the cooking fat of choice. However, in Occitan France, where duck and goose fat remained the most common cooking fat, duck confit remained common. It is in those regions, modern Gascony and Toulouse, where duck confit is today considered a specialty.[2]
Making confit at home is a 3-day process, but you will be richly rewarded for doing so! Not only will confit made at home be much cheaper than that at a French restaurant, you will also have cups of leftover duck fat, which can be used to make almost anything taste better.

Ingredients
6 duck legs
4 cups duck fat
¼ cup kosher salt
1 tbsp black pepper
2 bay leaves, crushed
1 bunch thyme
8 cloves garlic, smashed
While you can confit all the parts of the duck, most modern recipes call for duck legs. This is not because other parts of the duck don’t confit well, [3] but rather because in restaurants it is considered a bit wasteful to confit duck breasts, which can be served in a myriad of other ways. For duck legs, however, confit is considered to be the best possible preparation. The legs are full of dark meat and connective tissue, both of which respond well to a low and slow cooking method.
You can find duck legs in many grocery stores today, but I’d encourage you to buy whole frozen ducks and butcher them yourself (If you do so, here’s a top tip: confit the duck wings too!). This can be almost a third of the price, especially if you can find frozen ducks at a wholesale store like Costco. This recipe calls for 6 duck legs, with thighs attached.
The first step of the confit process is to salt the duck legs. While in modern kitchens with refrigerators, we no longer need salt to drive away microbes, a salt rub still serves several valuable functions. Salt seasons the meat, and draws out some water from the skin, which contributes to more even crisping later. It is important to use a coarse salt like kosher salt for the salt-curing process.[4] Large salt granules sitting on the surface of meat can draw fluids out from the meat without dissolving completely, facilitating the exchange of flavors critical to a curing or dry brining process, and allowing us to brush the salt off later. A fine-grained table salt will dissolve completely, giving us saltier meat and less dry brining action—both bad!


The salt rub is also a good opportunity to introduce other flavors to both the meat and the fat we’ll be cooking in. In a small bowl, mix together ¼ cup kosher salt, 1 tablespoon coarsely ground black pepper, 2 crushed bay leaves, and the leaves of about half a bunch of thyme.
Find a nonreactive (glass or ceramic) container in which the duck legs will fit. Spread about 2 tablespoons of the rub evenly on the bottom of the container. In addition to the rub, we will also be adding some aromatics to the curing container. Smash a few cloves of garlic and place half of the cloves in the bottom of the container, together with some whole thyme sprigs.
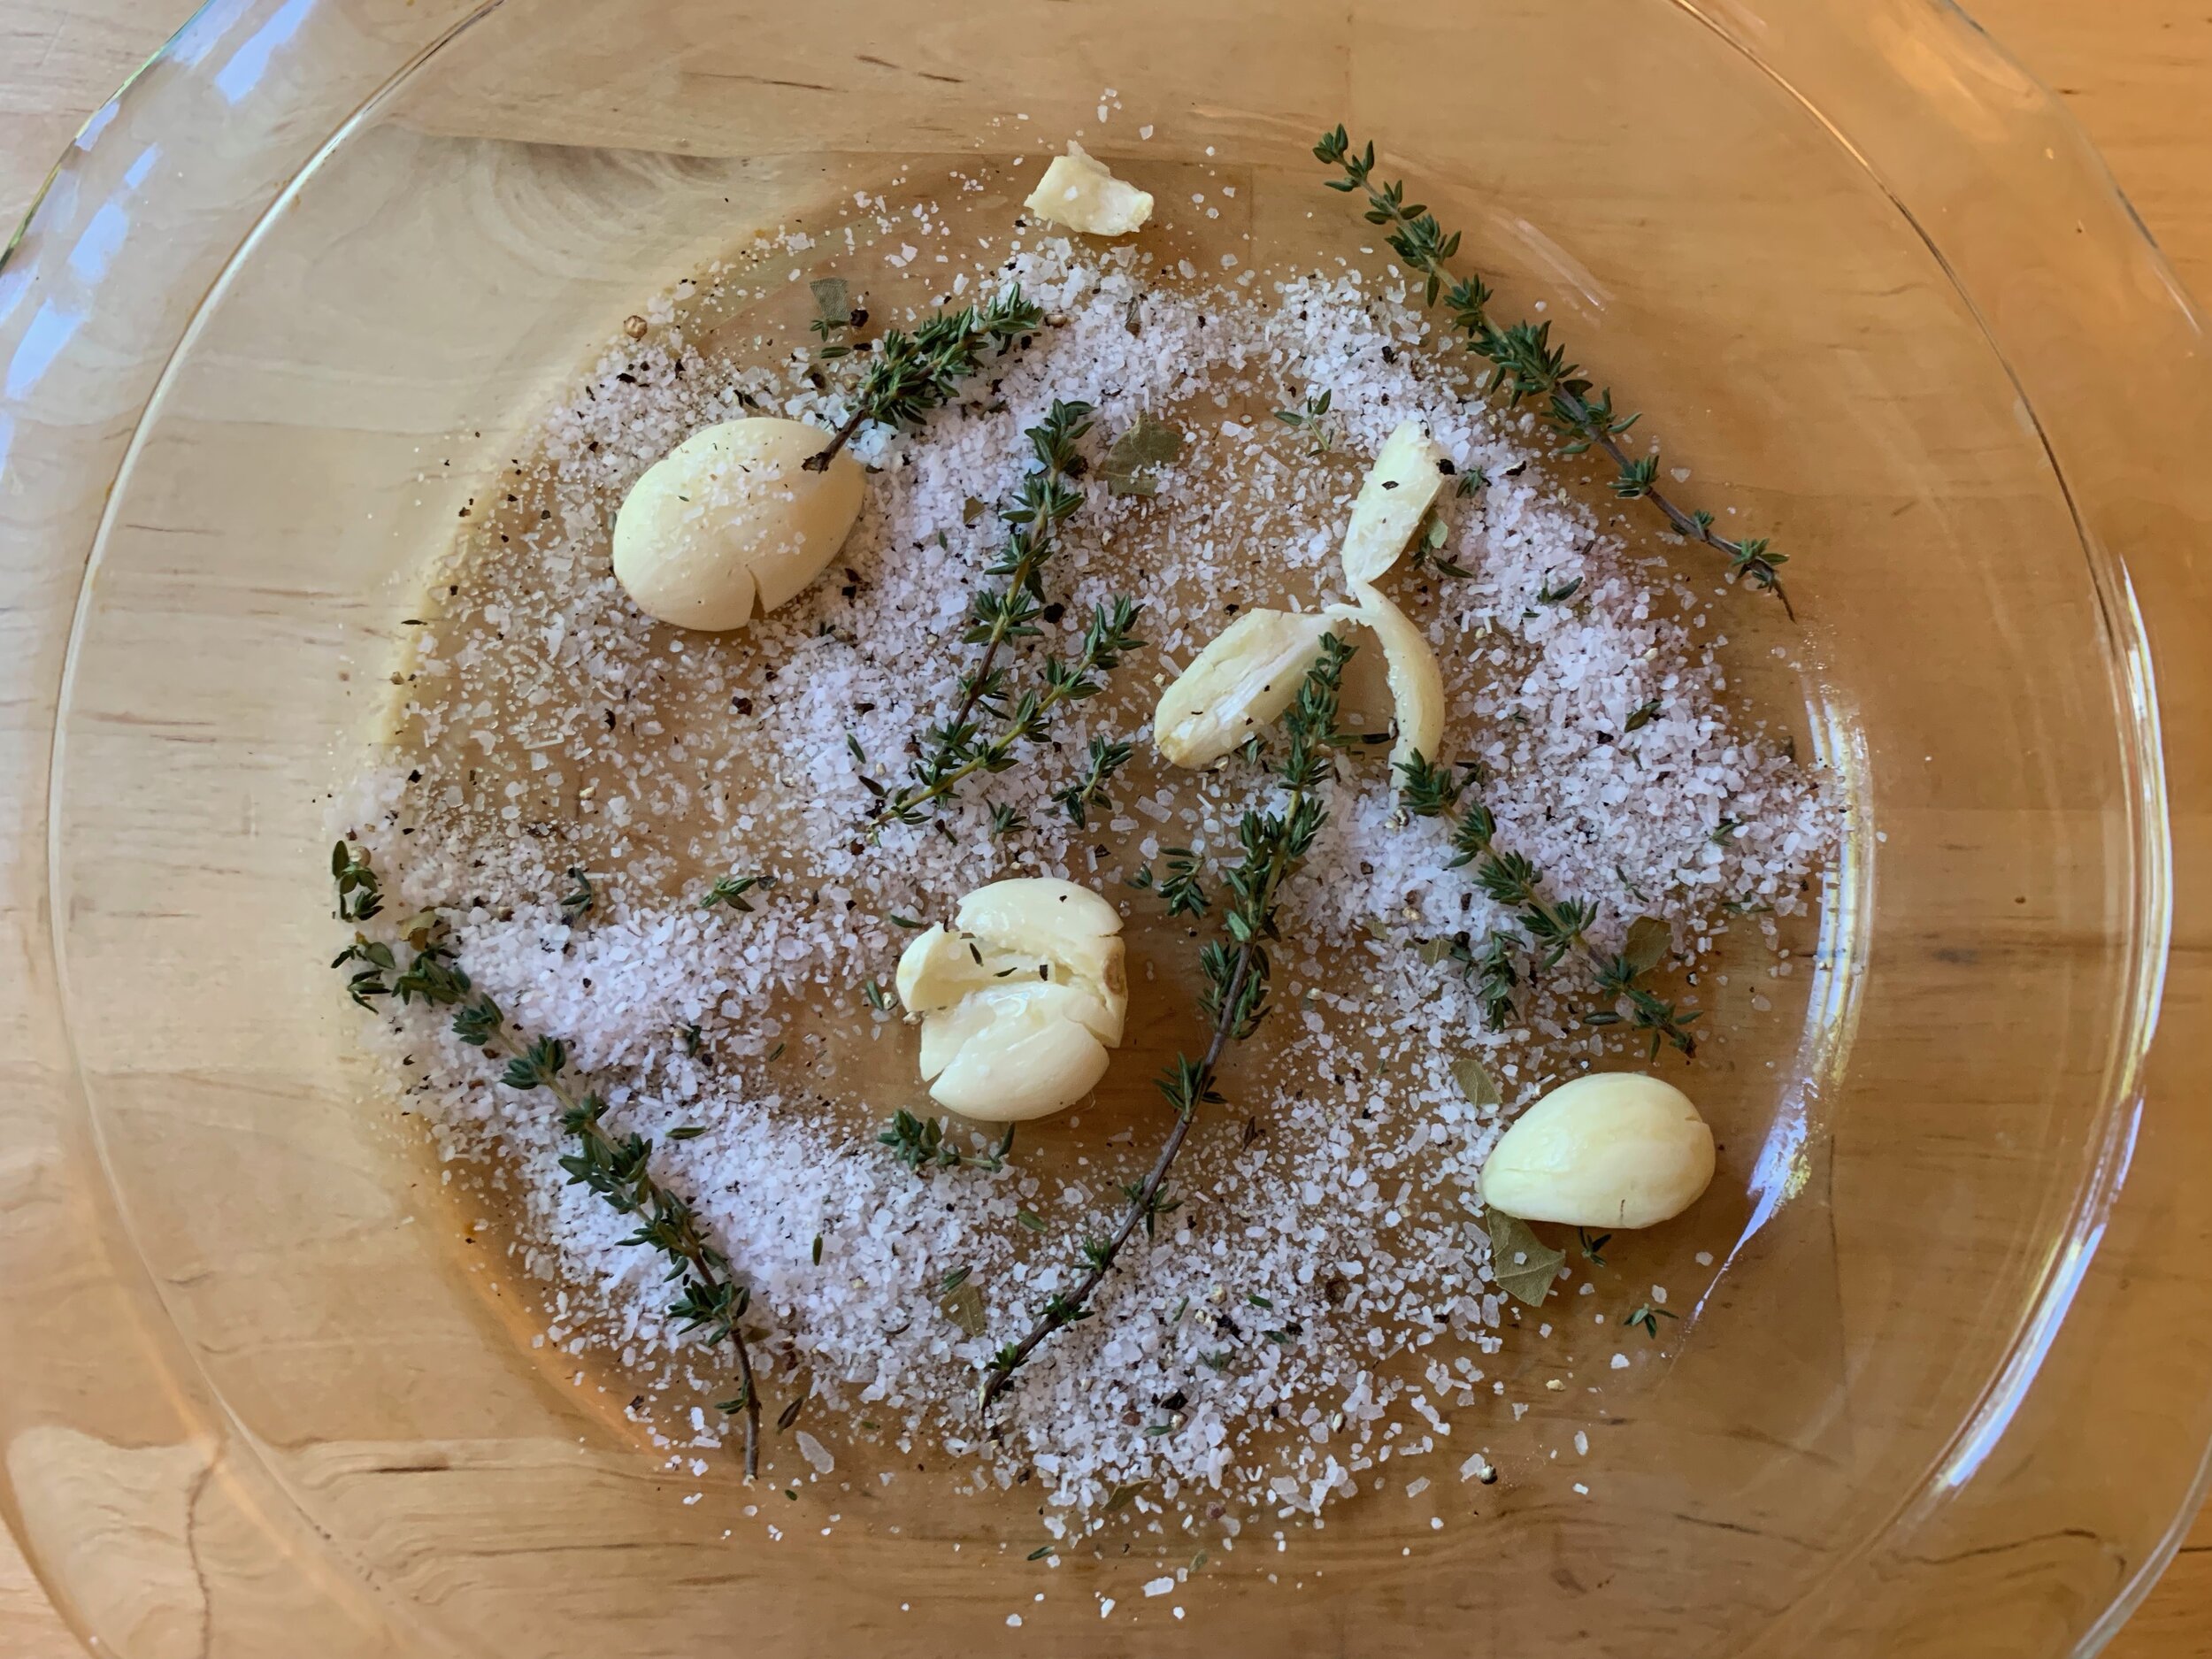


Pat the duck legs dry with a paper towel, and rub each duck leg with a generous coating of the salt mixture, on both the skin side and the fat side. Then place them into the container skin side up. Sprinkle any remaining rub over the duck legs, and place the rest of the garlic cloves and remaining thyme sprigs on top. Then cover the container tightly with plastic wrap, pushing out as much air as possible. Cure in the refrigerator for at least 24 hours, and up to 48 hours. After 48 hours, the duck becomes too firm and too salty.
While the duck cures, we have plenty of time to discuss the confit cook. While we are immersing food in oil, confit is not the same as deep-frying. A confit is a poach—it just so happens that the poaching liquid is not water or stock, but duck fat. What’s the difference between deep frying and confit? As Kenji Lopez-Alt says, “Confit is to deep fat frying what barbecue is to grilling. Low and slow versus fast and furious.”
While deep frying generally takes place at temperatures of 300° F or higher, the confit process requires a very low oil temperature, in the neighborhood of 190° F. This difference in temperature has some dramatic consequences. When we deep fry, we are generally looking for a crisp exterior. Fundamentally this is accomplished by two processes: 1) removing water from the surface of the food and 2) browning the surface with the Maillard reaction. At temperatures above the boiling point of water (212° F/100° C), any moisture in the surface of food being deep fried will quickly evaporate and be turned to steam. This is what creates the bubbles you see in the oil when deep frying. Without moisture, the surface of the food will quickly brown and crisp.
In confit, on the other hand, the temperature of the liquid fat is below the boiling point of water. In fact, if you’re doing it right, you should rarely, if ever, see a bubble rise up through the oil during the confit process. Critically, 190° F is higher than 160° F, the melting point of collagen. As the duck cooks, the collagen will break down to form gelatin, which is what gives slow-cooked meat dishes such as confit, brisket, and carnitas their richness.
You might think the confit process produces very greasy meat. However, the opposite is actually true. Because the entire cook happens at below the boiling point of water, the water in the meat cannot turn to steam and escape. The hydrophobic nature of oil means that the liquid fat acts as a barrier, preventing the water from escaping in liquid form. This means that duck confit remains moist even after many hours of cooking. Most of the duck leg’s fat has actually been rendered out by the low and slow cook. While some of the fat does enter the duck leg, most confit recipes will actually leave you with more duck fat than you started with!
Historically, in households which prepared duck or goose confit, the fat was reused many times, with small amounts siphoned off to cook other dishes with, replenished by the rendered fat from the next duck. Unless you plan on making duck confit every week, however, you’ll likely not have enough rendered duck fat lying about—this recipe calls for 4 cups. Worry not, however—this fat will not be wasted. Because the entire cooking process took place well below 375° F, the smoking point of duck fat, this fat can be safely reused, either to confit with again or in other applications. After being strained and cooled, duck fat can be stored, covered, in the refrigerator for up to 6 months, or tightly wrapped in the freezer for a year. Duck fat is great improving pretty much any pan-fried dish. Potatoes fried in duck fat is a French classic. You can also use it to sauté leafy green vegetables, fry eggs, or make savory pastries.
We’ve discussed temperature and fat—now it’s time to think about heat sources. It is possible to make duck confit on the stovetop. However, holding the temperature of the oil at 190° F with a stovetop thermometer for hours on end takes a great deal of patience and precision, and it is easy to overshoot or undershoot temperatures on the stovetop. Drift just 22 degrees over, and we will enter the realm of deep frying. The best heat source in the home kitchen for doing confit is the oven, which is designed to hold steady temperatures. We will set our oven to 225° F. Why are we using a temperature higher than the recommended oil temperature for confit, 190° F? You have to remember that what the oven is controlling is the air temperature of the interior of the oven, not the oil temperature. Oil has a high heat capacity, and together with the baking dish or a cast iron, it will take a long time to come up to temperature, and will likely never quite reach the air temperature of the oven (think about roasting a turkey—the oven is often set somewhere in the 300s, but even then it takes many hours for the bird to reach 165° F!).
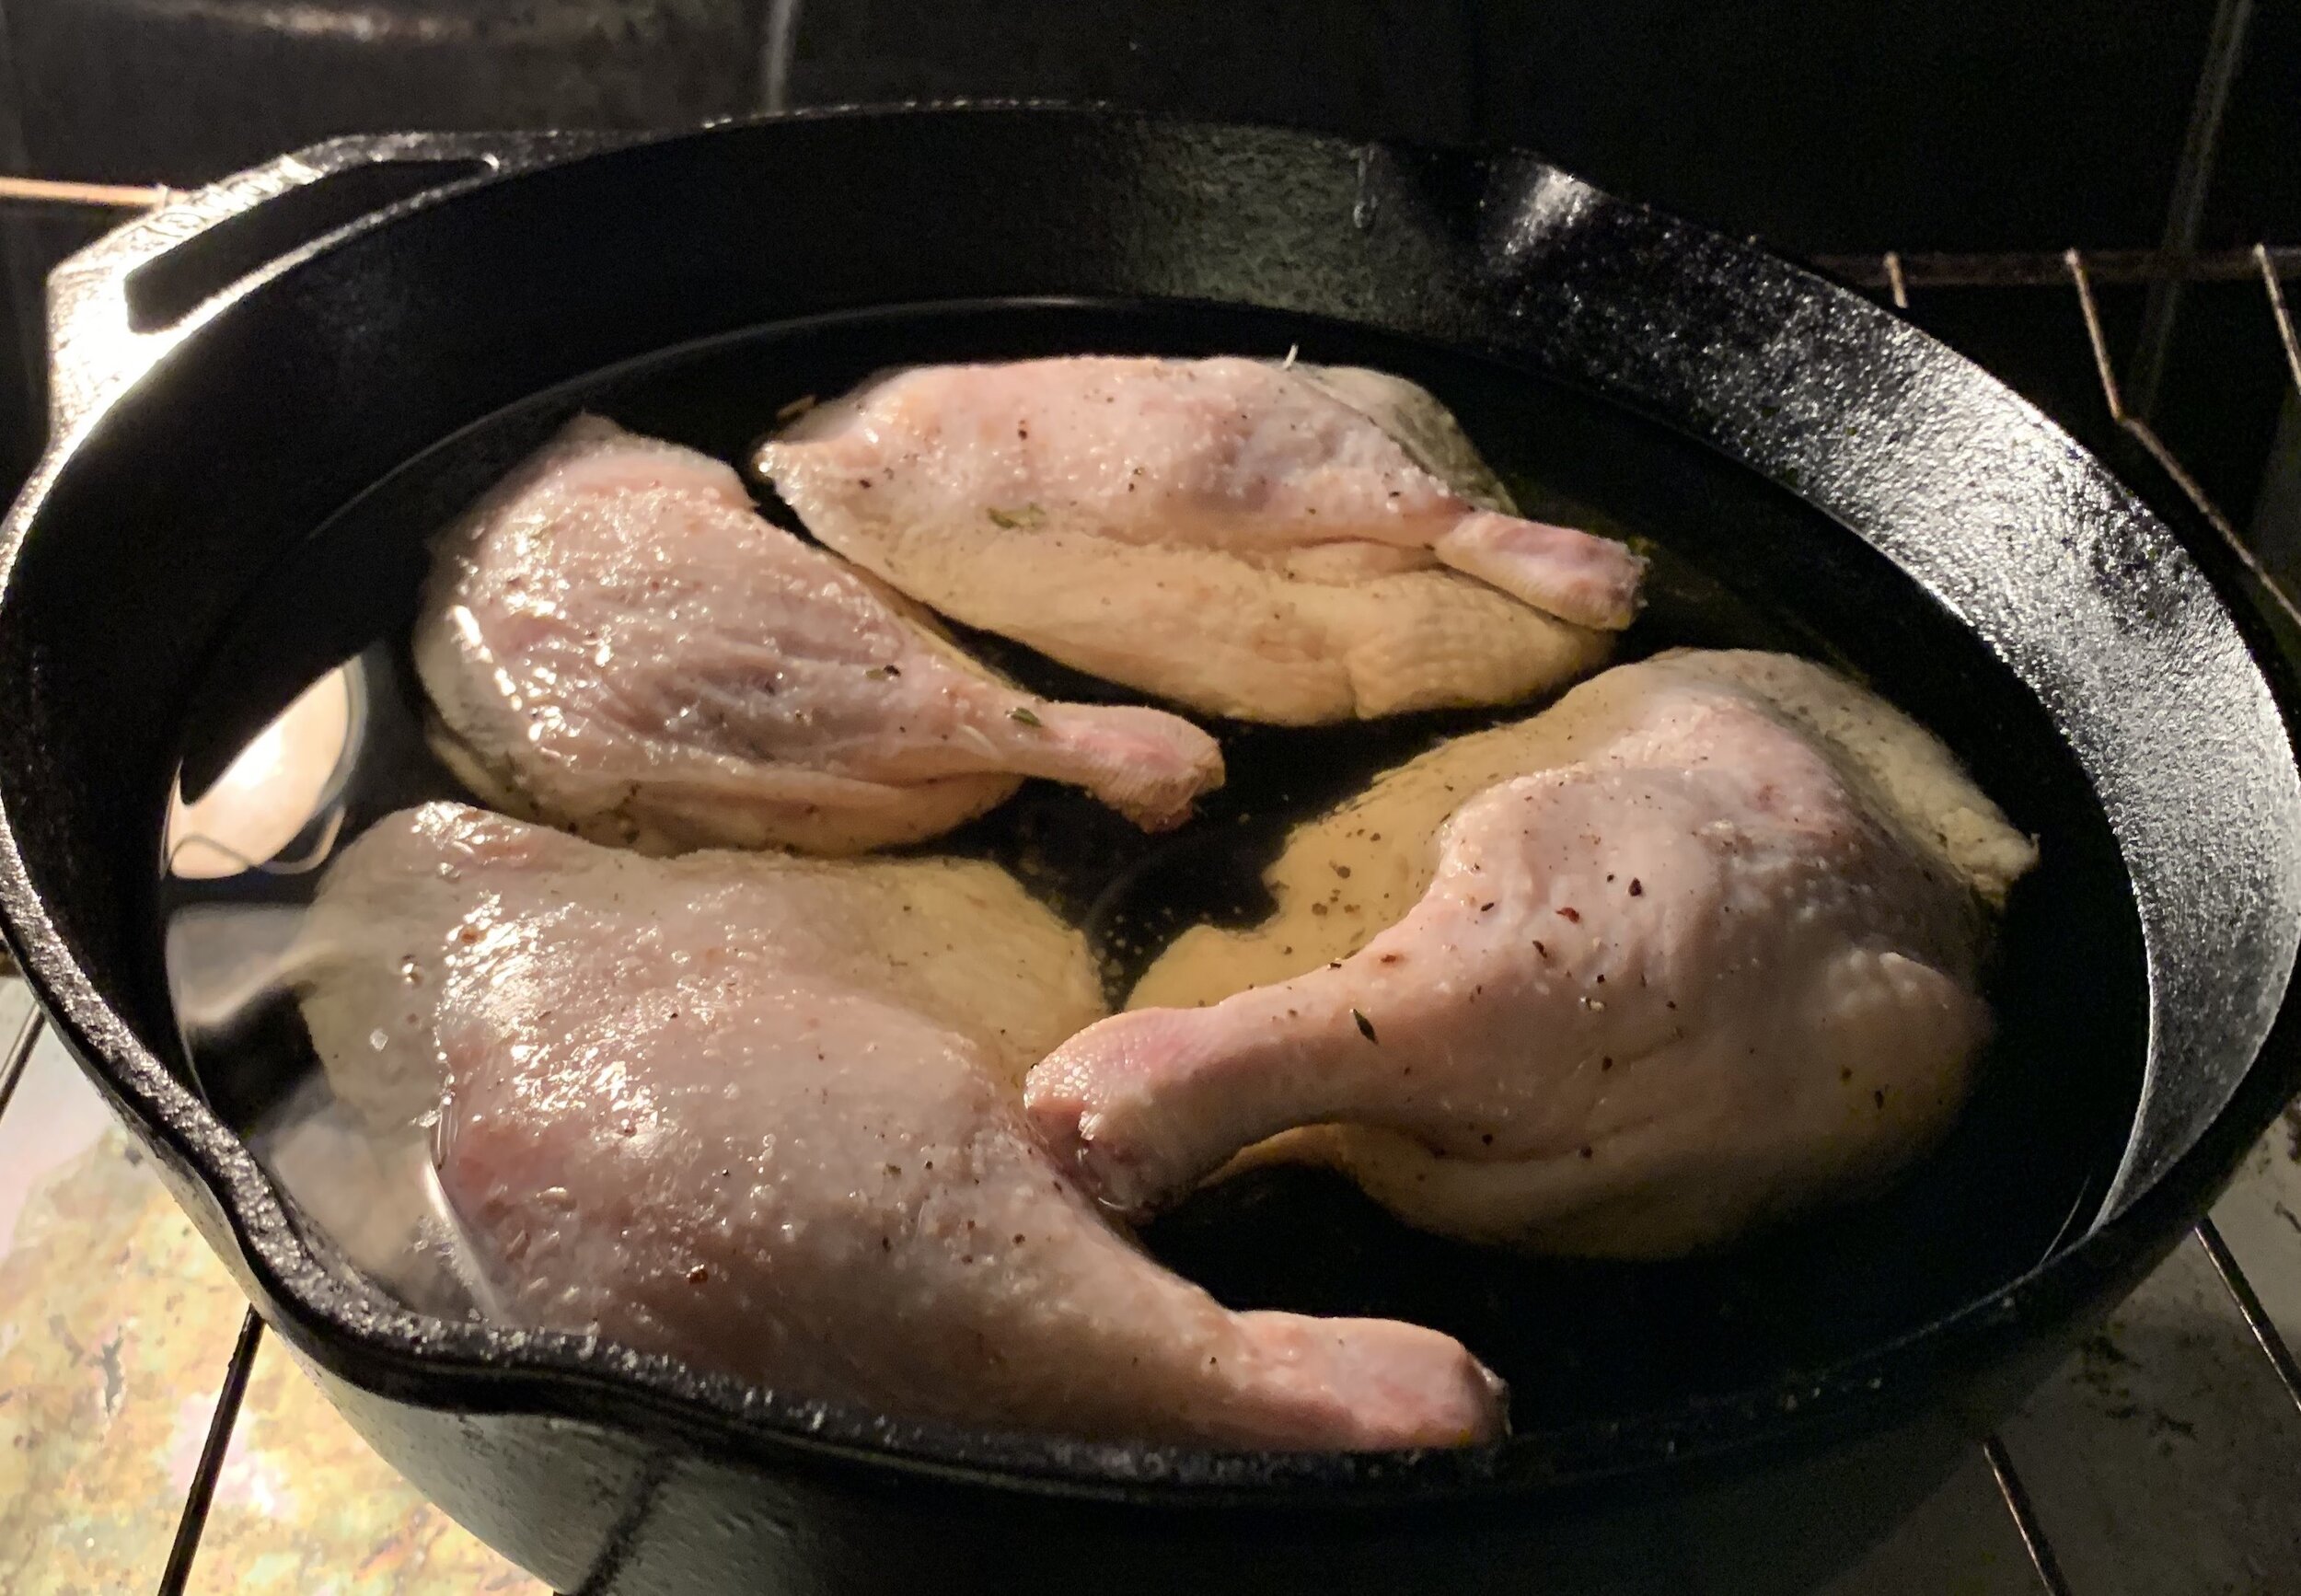
When you’re ready to cook, preheat the oven to 225° F. Find a cast iron pan or baking dish of a size which fits the duck legs snugly in a single layer. The duck legs need to be completely submerged in fat, and the smaller the pan, the less fat you’ll need! Place the pan over low heat on the stovetop and melt 4 cups of duck fat in the pan. As soon as the fat has turned to liquid, remove the pan from the stovetop. We are just melting the fat, not raising it to a cooking temperature.
Brush the salt rub off of the duck legs, then place them into the duck fat, skin side up. If the duck legs are not completely submerged, top off with additional duck fat. If you don’t have quite enough fat to cover the duck legs completely, flipping the duck legs once per hour during the cook works reasonably well.


Place the pan or baking dish into the oven, and cook for at least 4 hours. You should not see the oil bubbling at any point—if it does then turn down your oven (it may be improperly calibrated and running hot). Ovens often struggle to maintain constant heat at low temperature, so don’t make your oven’s job harder by opening the oven door! The oven should remain closed as much as possible during the cooking process. Continue cooking until the duck legs are completely tender, and have rendered most of their fat.[5] When you are satisfied with the texture of the duck legs, carefully remove the pan from the oven and let rest until the fat is cool enough to handle.
We have now cooked the duck, but before eating it, we have to let the duck rest overnight in its own fat, at least 8 hours. This final rest period might seem unnecessary, but it is critical to a great final confit. Letting the meat fibers slowly relax will result in a more tender final product. Additionally, the rest will give time for small amounts of flavored duck fat to penetrate the skin and the meat of the duck leg and solidify. These pockets of fat will help carry the flavors of the rub deep into the meat, and will also melt when the duck is reheated, giving us a juicier duck leg with crispier skin. If a duck leg is fried immediately after the confit process, most of the liquid fat will run out before the skin is crisped, leaving you with dry duck—poor recompense for such a long cook!


Remove the duck legs from the fat and place them in a glass container. Strain the duck fat from the pan, and then pour it over the duck legs. When it solidifies, it should completely cover the duck legs. Store any excess duck fat in a separate glass jar or container for other uses. Encased in their own fat, confit can be preserved in a refrigerator for up to three months. If you are looking for longer term storage, after at least 8 hours of resting, you can pull the duck legs from the solid fat, transfer them to a freezer-safe bag, and freeze them.

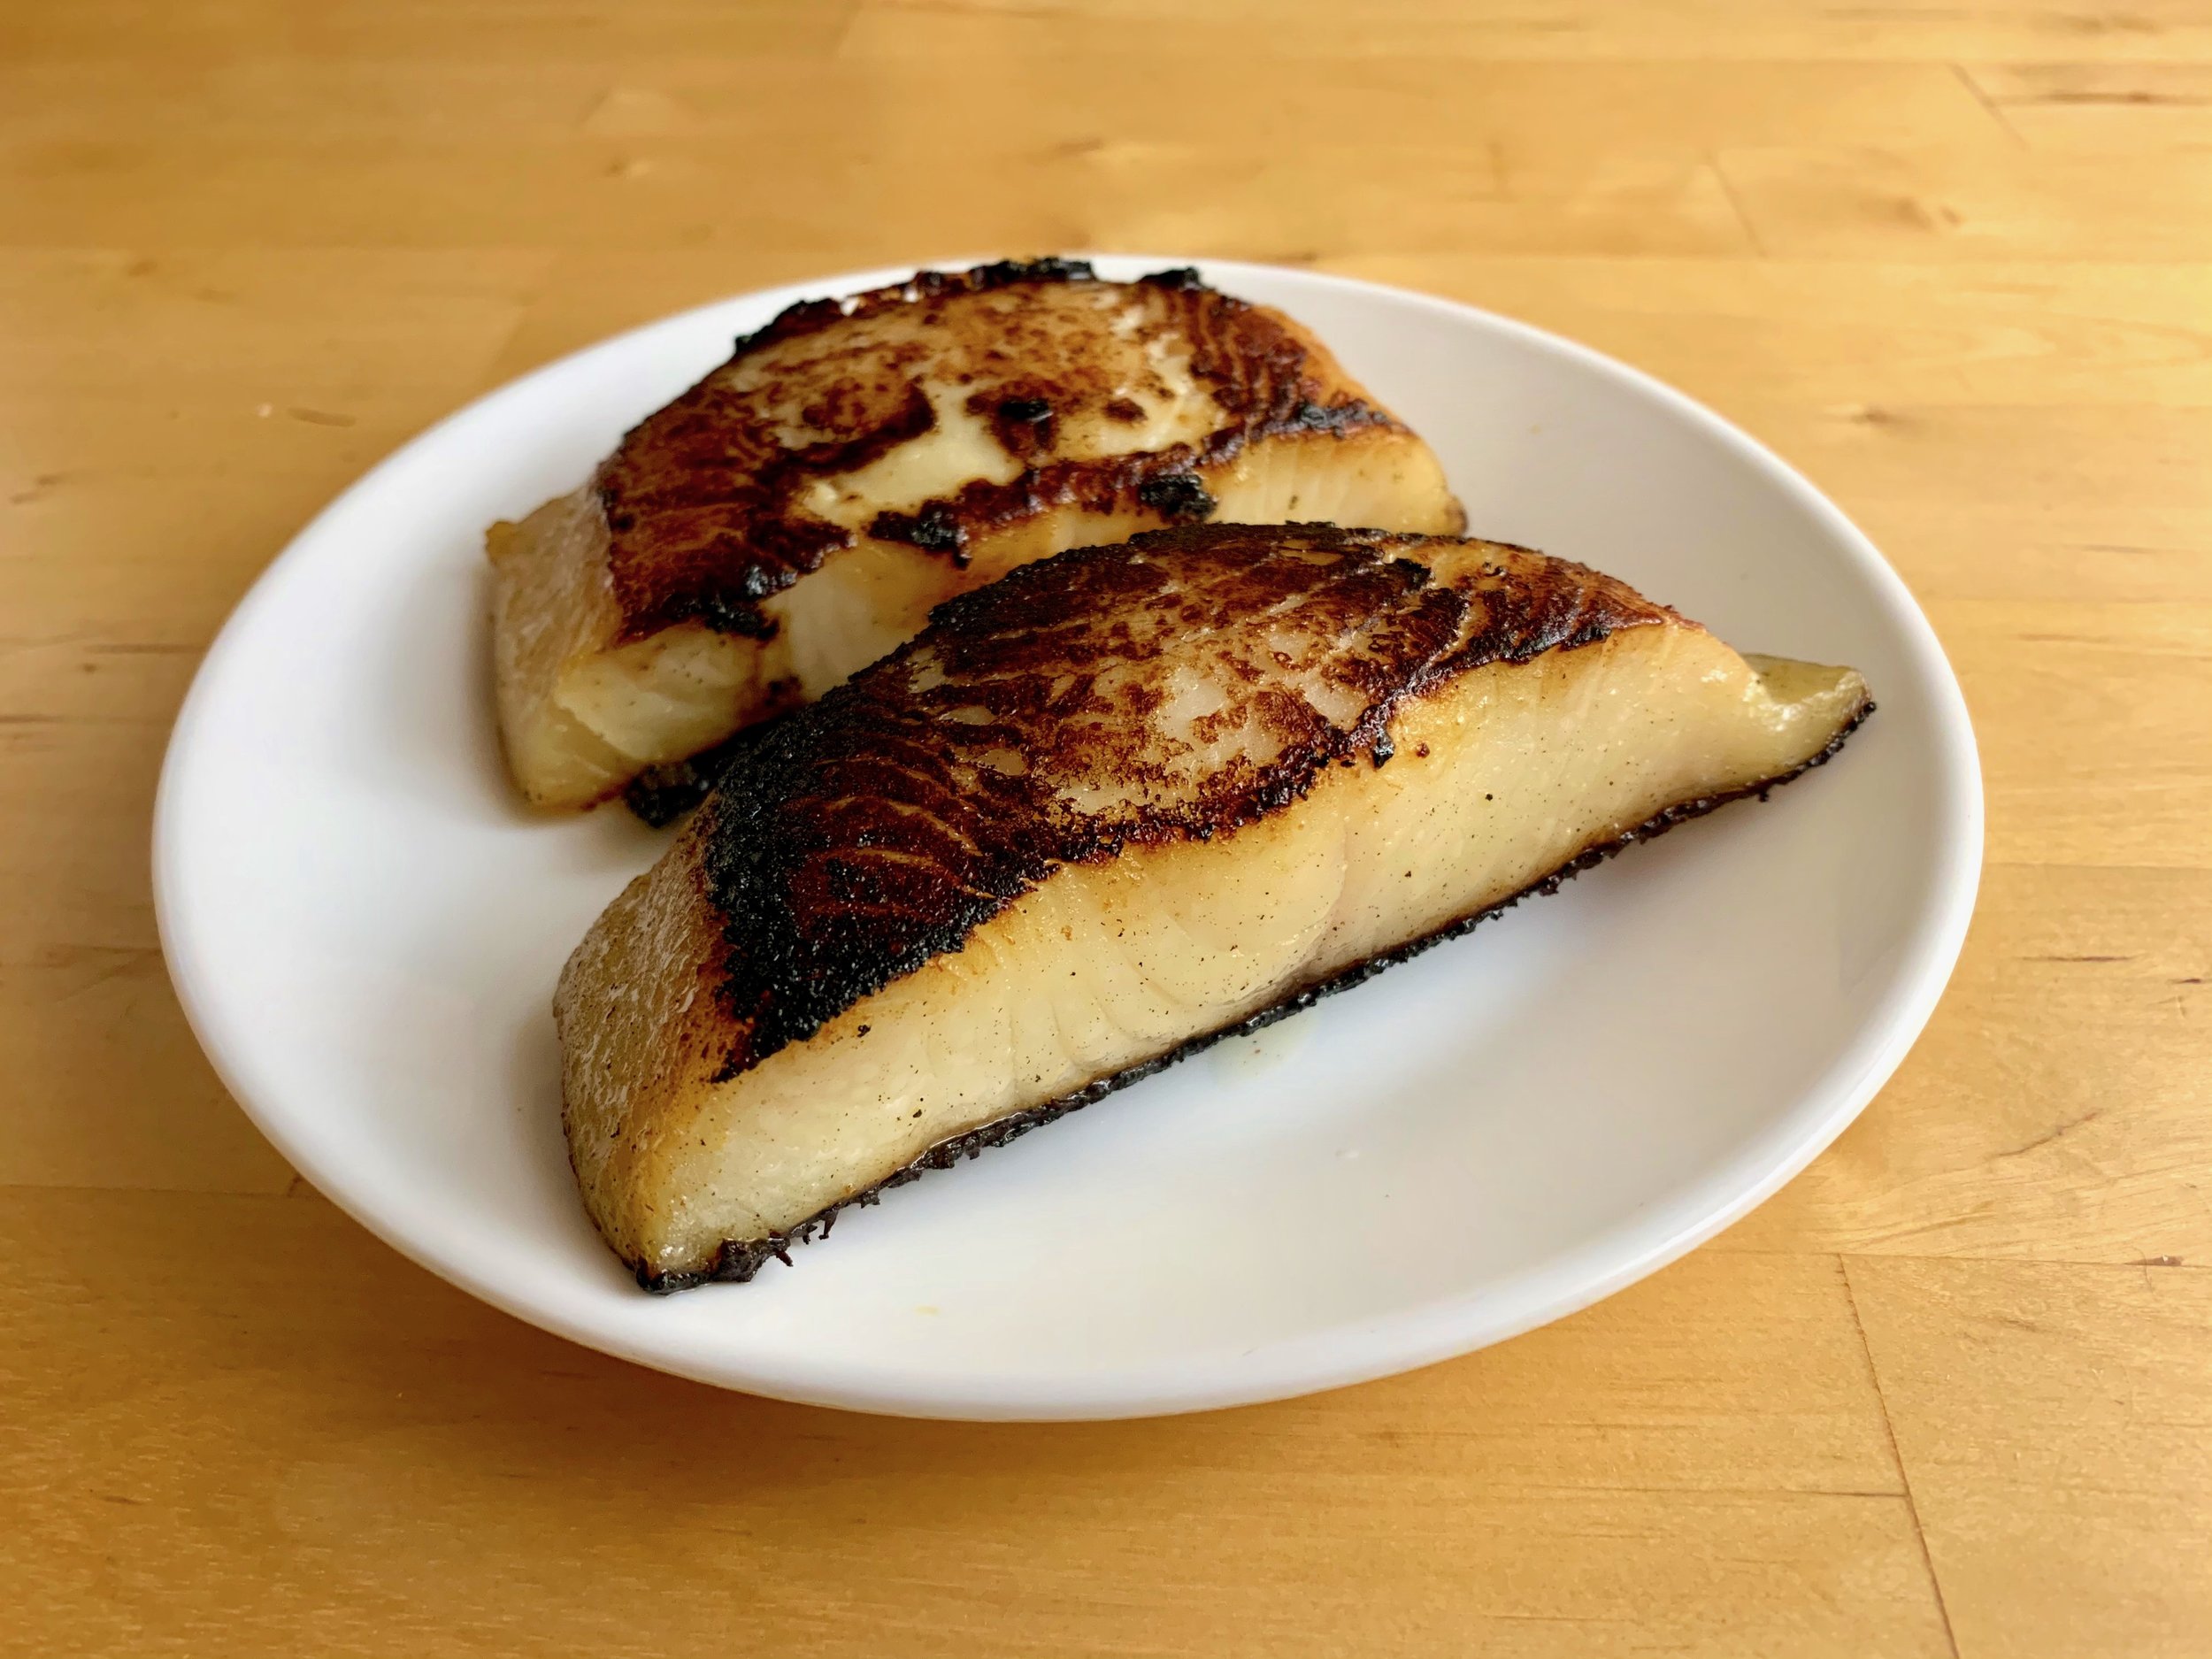
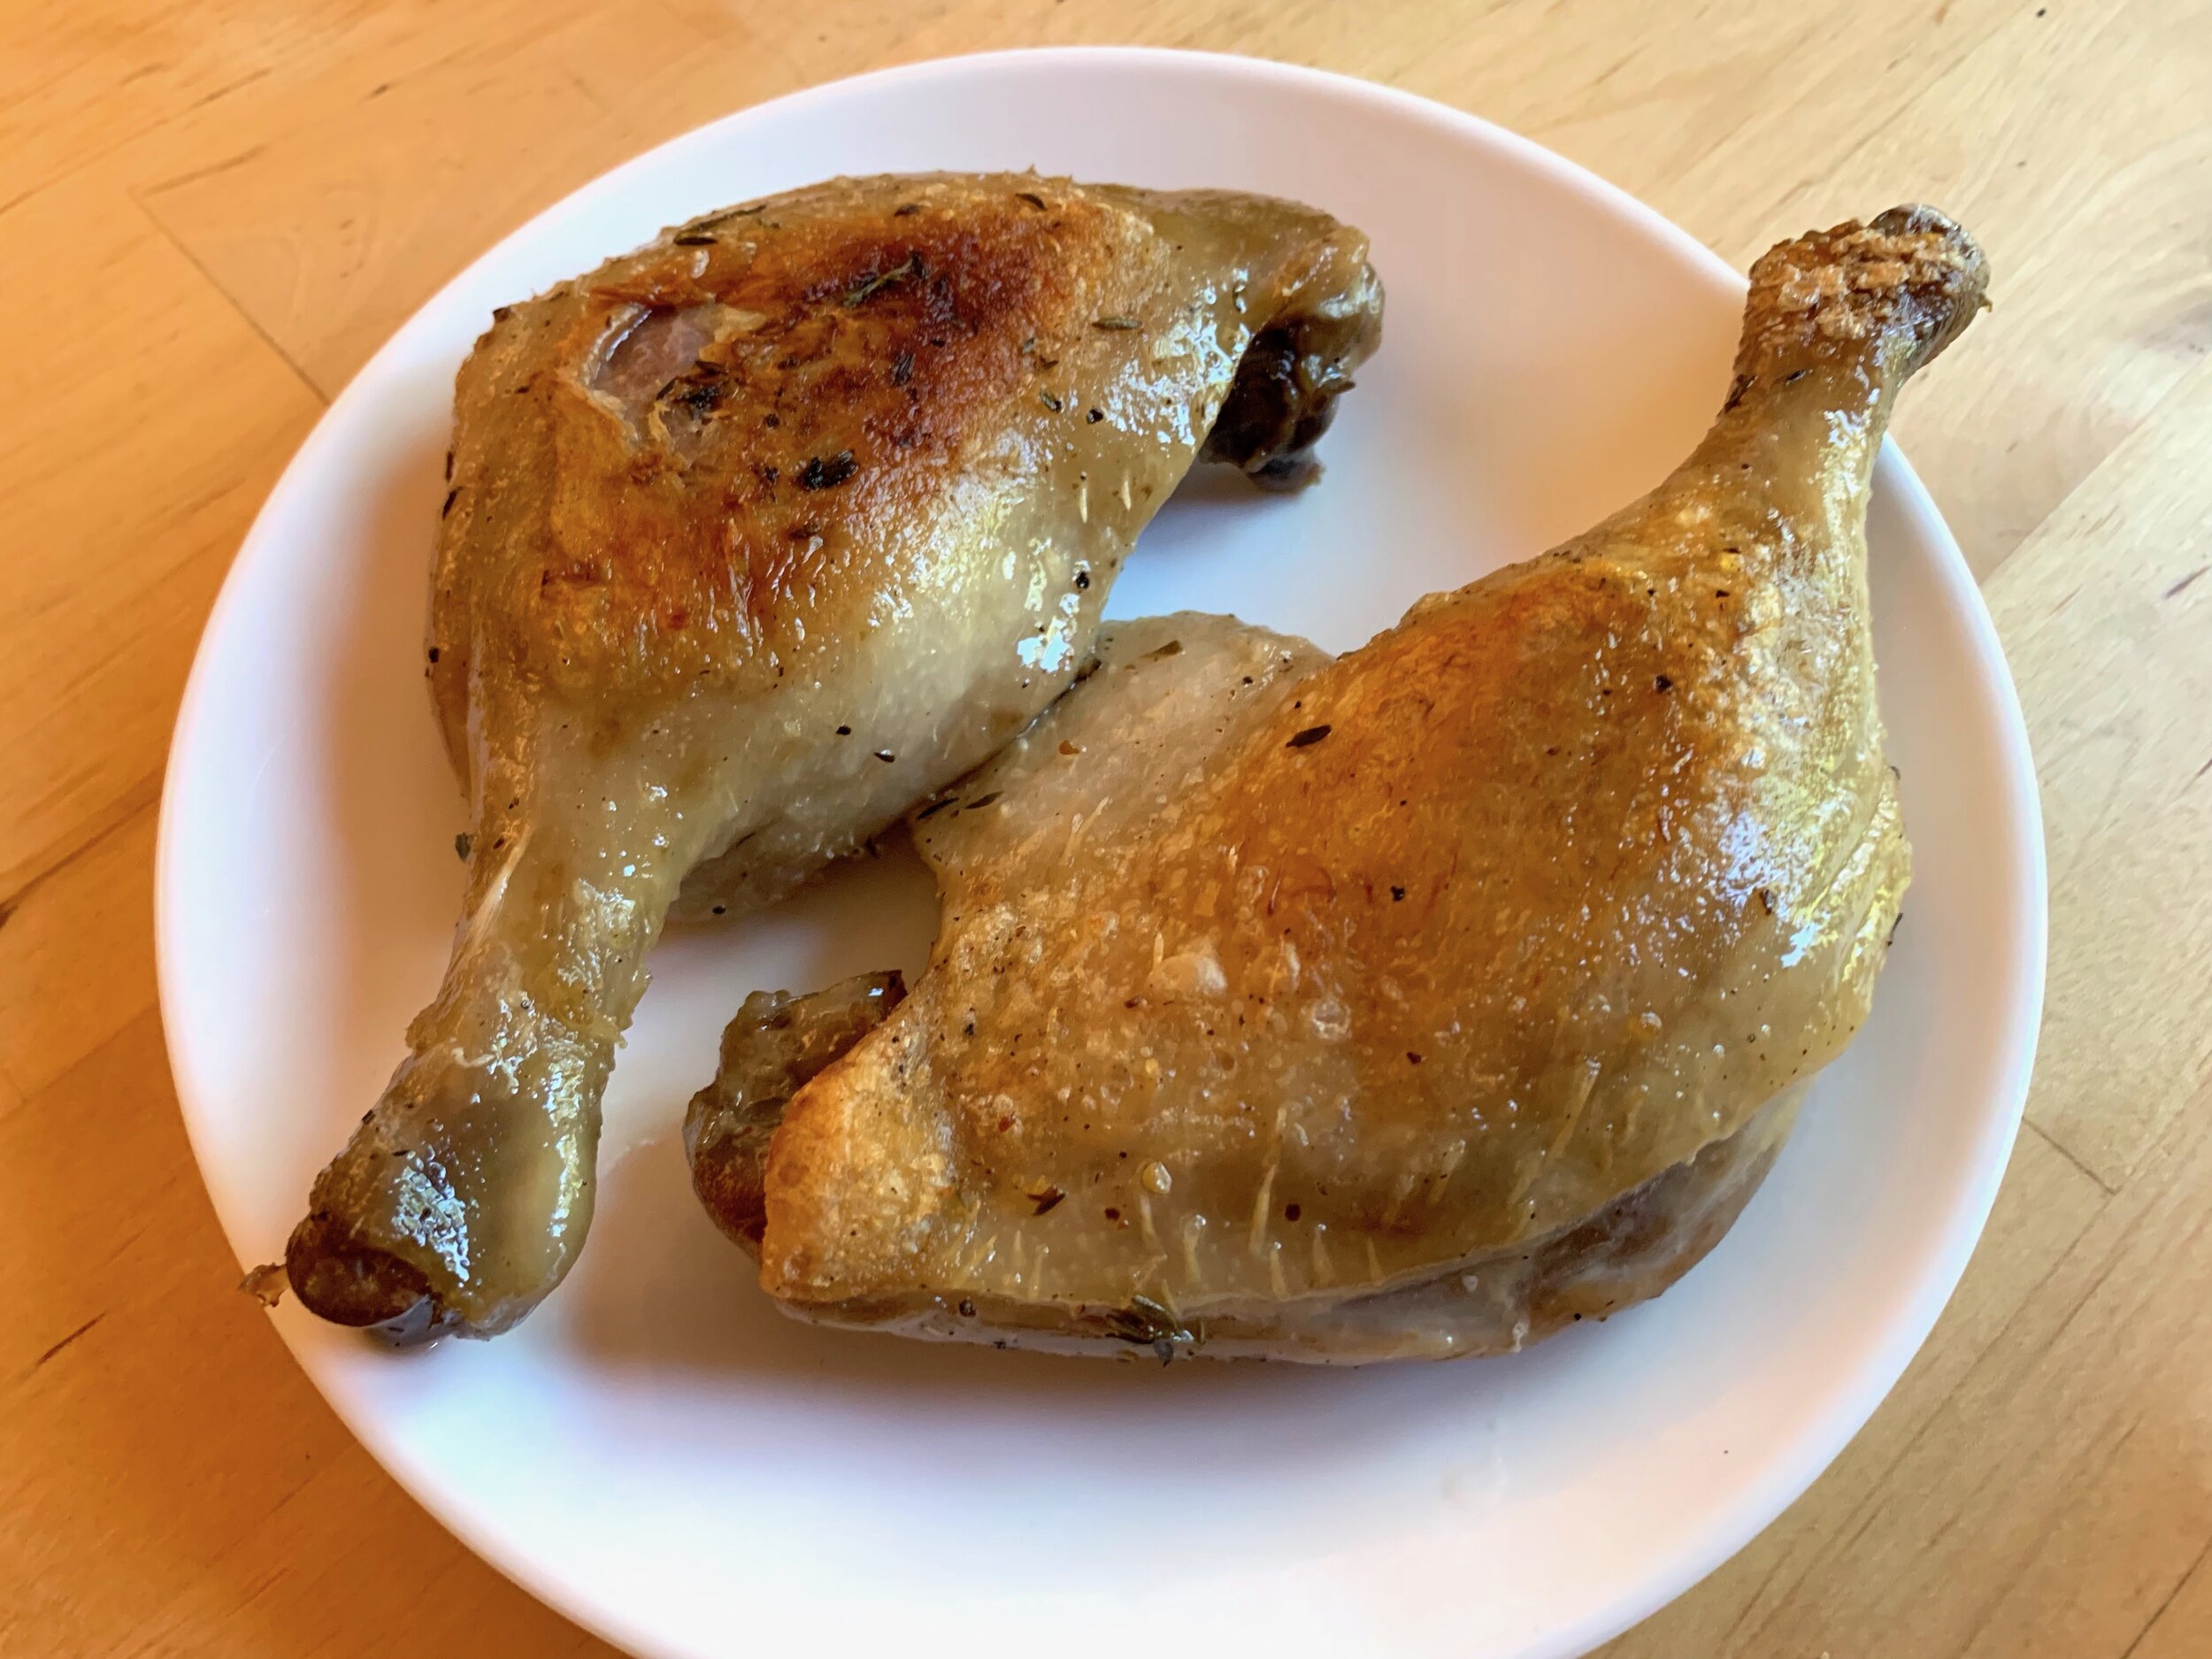
Duck confit can be used in a plethora of applications. It is a major component of cassoulet, and can be shredded for use in salads, sandwiches, and savory pies. The simplest way to serve duck confit, however, is just on its own, with the skin beautifully crisped up and with some potatoes and fresh greens. There are two ways to heat up the confit—in the oven or in a pan. Feel free to french the duck legs before baking or frying them, if you prefer that style of presentation.
To Cook (Baked)
Preheat the oven to 450° F. Wipe any excess fat off of the surface of the duck legs, and then place them skin side up on a foil-lined baking sheet. Place the duck legs in the oven and bake for 15-20 minutes, or until the skin is crisp and the duck is warmed through. If your oven at this temperature doesn’t crisp the skin sufficiently for your liking, switch to the broiler to finish the legs.
To Cook (Pan-Fried)
Heat about 1 teaspoon of duck fat in a skillet over medium-low heat. Wipe any excess fat off of the surface of the duck legs. When the fat is hot, place the duck legs in the skillet, skin side down. Press the duck legs down for the first 30 seconds, to help the skin come into contact with the surface of the skillet. Fry the duck legs without moving them in the pan, until the skin is crisp and the duck is heated through. This should take about 15 minutes.

Substitutions
While salt is mandatory in the rub, feel free to experiment with the other components of the rub. Dried parsley, minced shallots, rosemary, juniper berries, and/or lemon zest are all good choices. If you have leftover duck fat and are looking for other things to confit, I’d recommend some chicken legs, turkey legs, or garlic cloves.
You can choose to use olive oil instead of duck fat to confit in. This will result in a different, slightly lighter flavor. If you do so, do not use extra virgin olive oil.
[1] The word “confit” is derived from the French “confire,” meaning “to preserve.”
[2] Henri IV of France (reigned 1589-1610), “le bon roi Henri,” was a native of Gascony. When he took the throne, he is said to have ordered barrels of confit shipped from Gascony to Paris.
[3] In Gascony, traditionally all of the parts of the duck are used to make duck confit. The different cuts are then used in different ways. The breast is usually shredded, for example, while the duck neck is used to make garbure, a thick and hearty stew.
[4] The term “kosher salt” refers to the use of coarse salt in the process of kashering, in which salt is used to draw blood out of animal carcasses. Kosher salt is not necessarily approved to be kosher by a rabbi. Salt which has been approved by a religious body is labeled as “Kosher-certified salt.”
[5] Some recipes call for duck confit to be cooked for up to 10 hours.
Recipe
Prep Time: 15 min Cook Time: 4 hrs 15 min Total Time: 4 hrs 30 min
(+36 hrs inactive) (3 days)
Difficulty: 3/5
Heat Sources: 1 burner, oven
Equipment: small baking dish or cast iron pan
Servings: 6
Ingredients
6 duck legs
4 cups duck fat
¼ cup kosher salt
1 tbsp black pepper
2 bay leaves, crushed
1 bunch thyme
8 cloves garlic, smashed
Instructions
1. Mix together the salt, black pepper, crushed bay leaves, and the leaves of ½ the bunch of thyme to form a rub.
2. Pat the duck legs dry with a paper towel. Sprinkle about 2 tbsp of the rub on the bottom of a glass container, together with ½ of the remaining thyme sprigs and ½ of the crushed garlic.
3. Rub each duck leg with a generous coating of the salt mixture, then place them into the container skin side up.
4. Sprinkle any remaining rub over the duck legs, pressing the mixture into the skin with your hand. Place the remaining thyme sprigs and garlic over the duck legs.
5. Cover tightly with plastic wrap and refrigerate for 24 to 48 hours to cure.
6. When ready to cook, preheat the oven to 225° F. Use a cast iron pan or baking dish of a size to fit the duck legs snugly in a single layer. Place over low heat and melt the duck fat in the pan. Once the fat has turned to liquid, remove from the stovetop.
7. Brush the rub off of the duck legs, then place them into the pan skin side up. The duck legs should be fully submerged.
8. Put the pan into the oven and cook for at least 4 hours, or until the duck has rendered most of its fat and is completely tender. Remove the pan from the oven.
9. Place the duck legs in a glass container and pour over the duck fat. Let cool to room temperature, then refrigerate for at least 8 hours before serving. Confit can be stored like this in the refrigerator for several weeks. For longer-term storage, transfer the duck legs to a freezer-safe bag. The duck fat can be strained and reused.
To Cook (Baked)
1. Preheat the oven to 450° F, and place the duck legs skin side up on a baking sheet.
2. Place the duck legs in the oven and bake for 15-20 minutes, or until the skin is crisp and the duck is warmed through.
To Cook (Pan-Fried)
1. Heat 1 tsp duck fat in a skillet over medium-low heat. When the fat is hot, place the duck legs in the skillet, skin side down.
2. Fry without moving until the skin is crisp and the duck is heated through, about 15 minutes.